Monday, February 25, 2013

Use Every Stamp Update

This is my weekly check-in for My Creative Classroom's "Use Every Stamp" challenge, which I turned into a "Use Every Cricut Cartridge and more stamps, too" challenge.   You can sign up for this FREE class called "Use Every Stamp."  just by signing up to receive the Newsletters and then you can participate in all the forums.  There is also a blog that posts from the class and will even have opportunities to win free seats in other MCC classes. 

The Monday Report:
For the Week of February 18 - February 24, 2013:

  • This week I've finished up a super cute owl mini album for an upcoming class at MCC (I mean stinkin' cute! but I can't show it yet);
  • I completed a layout for DCWV's February Stack-a-holic Challenge (used 4 carts in this one!) - see this post.
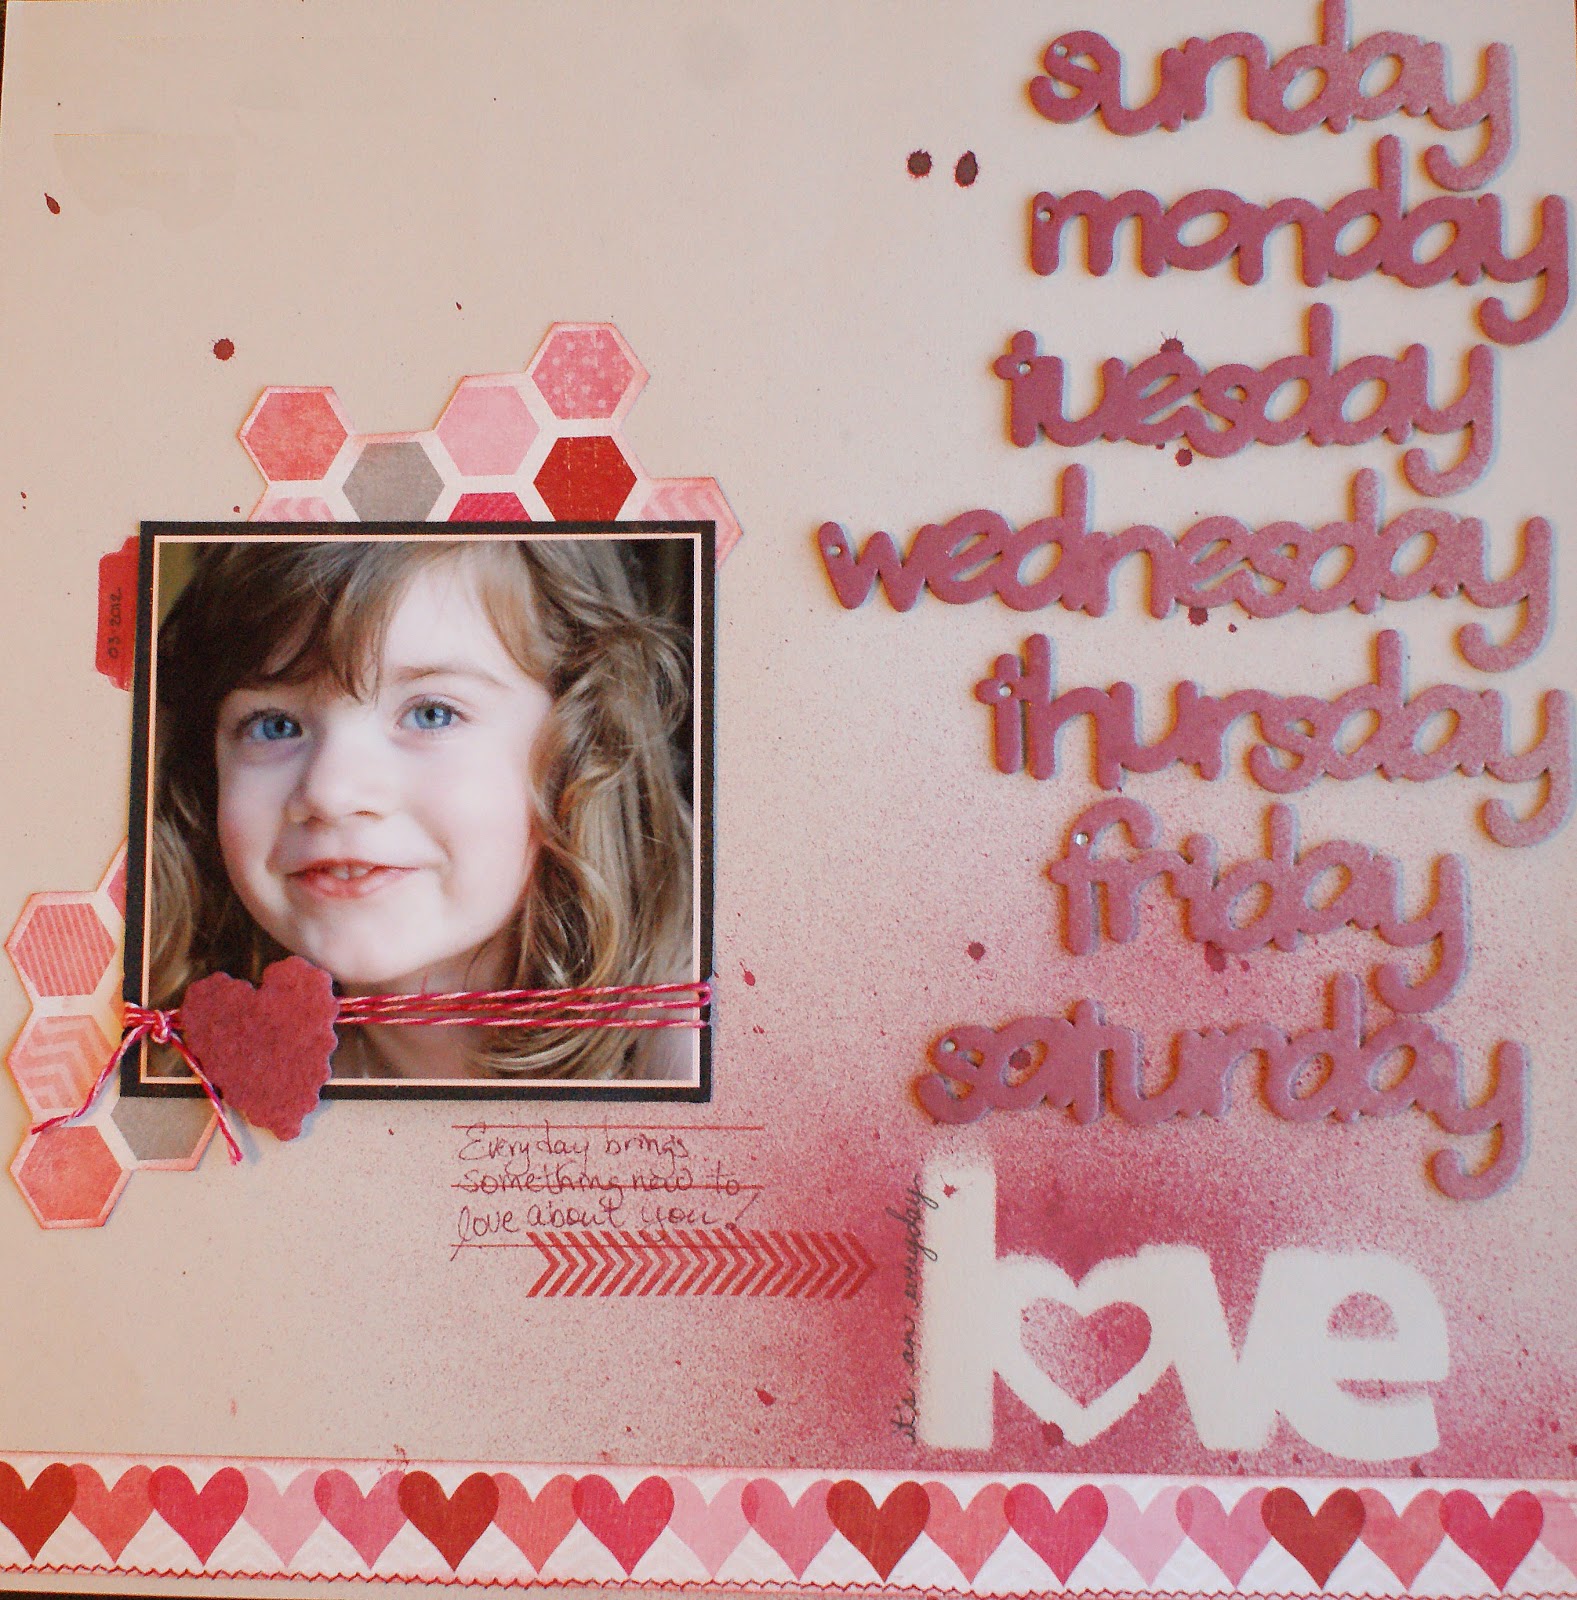
  • I finished the layout at the top of this post. The titles for this layout were cut with the Birthday Bash cartridge.
  • Running Total: so far this year I've used 27 out of my 102 total cartridges.  Yay! 
  • Umm, did I mention it was my birthday this last week?  I got two new cartridges - Ribbons & Rosettes and Folk Art Festival :)  I used Ribbons & Rosettes in the DCWV layout, but I have to update my Gypsy now to link Folk Art Festival (wish me luck).
Happy Crafting, Everyone!

DCWV Sketch Challenge

I recently celebrated my birthday (29, again!) and as a treat, I went out and bought myself a few new stacks.  My picks were "The Delightful Stack," "Juniper Berry," and "White Ginger."  Whoo hoo! 
For February's Stack-a-Holic Challenge, I used my new "Delightful" stack (perfectly named, by the way).  I know the hexagon trend has been around for awhile now, but I still love it and I love it for paper collections because it's easy to incorporate many different patterns into a layout.  I think this is a sketch I can use over and over again.

Here's my entry layout:
I tried to highlight the blowing of the dandelions with a few elements from the large dandelion cut in the Lyrical Letters Cricut cartridge.  I just cut the "sprays" from the large flower and placed them around the page.  The scalloped border is from "Ribbons & Rosettes" and I created the title using the font from "Cindy Loo."  All the papers are from DCWV's "The Delightful Stack."  I inked most of the elements with some "Milled Lavender" Distress Ink from Tim Holtz.  It's not a color I use too often, but it was absolutely perfect for the colors in this stack.


Wednesday, February 20, 2013

Valentine Shirt

Hannah wanted a pink shirt with a heart to wear for Valentine's Day.  What's a crafty mama to do?  Make one of course!  I found a shirt in her drawer to use (cuz I'm cheap frugal that way).  I cut out a stencil of plain cardstock with my Cricut - this cute "xo" heart is in the "Hoot 'n' Holler" cartridge.  I helped it stick to the shirt with a little temporary glue stick around the edges and the "xo" and then just a bit of painter's tape around the outside edges to help keep it in place as we painted.  I had some pink glittery fabric paint on hand (go figure :)) that was perfect.  Hannah had a fun time helping with the paint.  She was so excited she could hardly wait for it to dry!  On Valentine's Day, she went all out with pink wardrobe choices - from her toes to her multi-bowed hair accessories!  Such a sweet Valentine!


I know it's Wednesday, but here's my
Monday Report:
For the Week of February 11 - February 17, 2013:
  • Embellished shirt with Cricut stencil and fabric paint
  • Made a big heart Valentine for Daddy (Cricut)
  • Worked on layouts for upcoming online classes (2 additional cartridges used)
  • played with new stamps from Teresa Collins

Tuesday, February 12, 2013

Watercolor Hearts


Hannah and I had a bit of fun with watercolors and coffee filters this week.  We painted several large filters, let them dry and then hand cut out heart shapes from them.  We cut out some big ones and she stuck them up on a window - they are so pretty with the light coming through.  I also cut several small hearts which I then made into cards for her to send to grandmas and grandpas for Valentine's Day. 
For the cards, I used a plain white cardstock base and sewed the hearts onto the card with a diagonal stitch in black.  I then used a black pen to doodle on an arrow point and fletching.  The thread is secured by applying some Glossy Accents to the ends.  I used various love stamps and a little pink ink below the heart for a sentiment.  It was a fun and easy project to do.  Hannah loved the painting part and I had fun turning her art into a card to send to family.


The Monday Tuesday Report:
For the Week of February 4 - February 10, 2013:
I created 1 more Valentine treat (new kid at preschool),  12 watercolor heart cards (3 different stamps), and 4 birthday cards using the Hoot'n'Holler cartridge and 1 stamp.

Cute Birthday Cards:
  
This is my weekly check-in for My Creative Classroom's "Use Every Stamp" challenge, which I turned into a "Use Every Cricut Cartridge and more stamps, too" challenge.   You can sign up for this FREE class called "Use Every Stamp."  just by signing up to receive the Newsletters and then you can participate in all the forums.  There is also a blog that posts from the class and will even have opportunities to win free seats in other MCC classes. 

Wednesday, February 6, 2013

Everyday Love with Chipboard Masks

This week's Scrapdoodles Design Team post is all about LOVE!  I believe in documenting the everyday kinds of love in my scrapbooks - not just the big events and milestones.  This week I'm using two different "love" lines now available at the store - American Crafts (XOXO) and imaginisce (Love You More) and some really fun and versatile chipboard and acrylic accents from Maya Road.  The American Crafts and imaginsce lines went really well together so they are combined in my two layouts.  Lately, I've been experimenting with misting and when I saw the days of the week chipboard accents from Maya Road (which, by the way, are on SALE this week and next at Scrapdoodles!) I immediately saw the page in my head.  I simply laid out the chipboard on a full sheet of 12x12 paper in a sunburst pattern and used my Tattered Angels Mist (Red Velvet) to cover it.  The mist dries fairly quickly, so I didn't have to wait long to pick up my chipboard and admire the negative left on the page.  I added several strips of patterned paper from these collections behind my photo to create a "mat" for it.  My title was cut with my Cricut (Graphically Speaking).  I also added a clear acrylic heart to my page.  I adhered tiny gems around it to emphasize its shape.  There are also several accents around the page that were cut from the patterned papers or found in my stash.  I finished it off with a couple of sentiment stamps (MME).

My second layout is similar in theme, but I really wanted to use the actual chipboard shapes this time.  I love how the mist covers the chipboard so nicely!  I adhered them to my page using glue dots.  For this page I also added another masking and misting feature, this time using another one of the clear acrylic elements from Maya Road (love).  I also did a little bit more heavy dripping on this page, which I really like.  The hexagon patterned paper from imaginisce is awesome.  Here I cut out a few pieces and arranged them diagonally behind my square photo.  For extra dimension, I wrapped twine around the photo and mats.  The strip at the bottom of the page is also imaginisce and is sewn down at the bottom edge.  I hope you're able to come into the store to see these two layouts!  The misting was new to me and I really love that it's so forgiving in terms of technique.  There are a lot of possibilities.  Did I mention that Maya Road Chipboard is on sale?

More details:

And one last project for you that was so easy to put together!  Scrapdoodles has these cute clear acrylic pillow boxes in several sizes.  All you need is a little patterned paper and embellishments to create some super cute Valentines!  Stop by and see my cute version - but don't eat my m&ms!  Then find some cute love papers and craft up your own version to give to your sweetie.


Sunday, February 3, 2013

Valentines and Use Every Stamp Report

The Monday Report:
For the Week of January 28 - February 3, 2013:
I created 3 12x12 layouts, 2 felt pins, and 10 Valentine's Day treats for my daughter's preschool class.  I used a total of 5 different cartridges.  I also used 4 different stamps from 2 sets.

This is my weekly check-in for My Creative Classroom's "Use Every Stamp" challenge, which I turned into a "Use Every Cricut Cartridge and more stamps, too" challenge.   You can sign up for this FREE class called "Use Every Stamp."  just by signing up to receive the Newsletters and then you can participate in all the forums.  There is also a blog that posts from the class and will even have opportunities to win free seats in other MCC classes. 

Here is a pic of my Valentine's Day treat boxes.  The cute little bug is from Create A Critter 2, as is the leaf.  The stamps are from Stampin Up's "Everyday Flexible Phrases" set.  I bought the clear pillow boxes at my local scrapbook store, Scrapdoodles.  LOVE THEM!


The layouts I created this week were either for my upcoming class at MCC "Cricut: Scrapbooking Through the Year" or for my Design Team week for Scrapdoodles, so I can't show you any of them.  But...check back on Wednesday because I'll be able to post my Design Team layouts then - and they are awesome, if I do say so myself ;).  Here's a little sneak of a close-up of one of the layouts featuring some stamping with some My Mind's Eye acrylic stamps.

Be sure to stop back on Wednesday to see the full layouts!

Here are the two super cute felt pins I made for my daughter's teachers.  I used the heart with wings on the Create a Critter 2 cartridge to make a template for the red and white felt layers.  The eyes are black beads, mouth is black thread.  I added crystal stickles onto the wings and yellow glitter glue to outline the halo.


Happy Crafting!


My goal is to report in every Monday, so check back often and keep me accountable!