Showing posts with label fall. Show all posts

Thursday, September 21, 2017

Mixed Media Home Decor


I love fall and can't help creating a project or two featuring fall's rich colors. Today I'm sharing a fun mixed media project with lots of layers! 
Watch this video to see this project come together.


The finished project with all its yummy layers, including: paper, paint, washi tape, clear stickers, stamps, vinyl, and jute twine.
I'm ready to decorate for fall. Are you, too?


For this project, I used:

Friday, September 15, 2017

Coffee Card

I love the increasing crispness to the mornings, lately. Fall is in the air. This cute coffee card is just the thing to brighten a friend's day. I used my Cricut to cut the coffee cup, a bit of fall washi to decorate the lid, and SRM's "Coffee Plans" stamps for the sentiments and beans. Enjoy!

Need more coffee inspiration? 
There's a whole hop with prizes at the Coffee Lovers Blog!
Check it out HERE!


Wednesday, October 16, 2013

Autumn Layouts with We R's Harvest Collection

Oh, how I love the fall!  I love the tastes, the smells, the cooler temperatures, the beautiful colors!  It's my favorite season by far.  We R Memory Keeper's new "Harvest" collection is perfect for highlighting your fall photos and projects.  I love the warm yellow mixed with steely blue and orange and black.  This collection also has some great patterns - weathered wood, chevrons, and more - a little bit "old" and a little bit "modern."  I've created two layouts to share with some Harvest papers and embellishments picked up at Scrapdoodles.  Come back on Friday for a third layout and a challenge for you!

For my first layout, I began with the awesome orange chevron paper. I love how this paper is lighter at the top and gradually gets to a darker orange/brown at the bottom - a great ombre effect that really adds interest to the layout.  The large 4x6 card is from the Harvest Albums Made Easy collection (must get this!!!).  I embellished the bottom title strip (cut from one of the 12x12 sheets) with a border and simple twine threaded through.  Notice how I notched the ends?  This adds interest and keeps my twine exactly where I want it.  The "who, when, where" journaling bits are from another strip from that same 12x12 sheet.  I added a few embossed stickers to complete this layout.
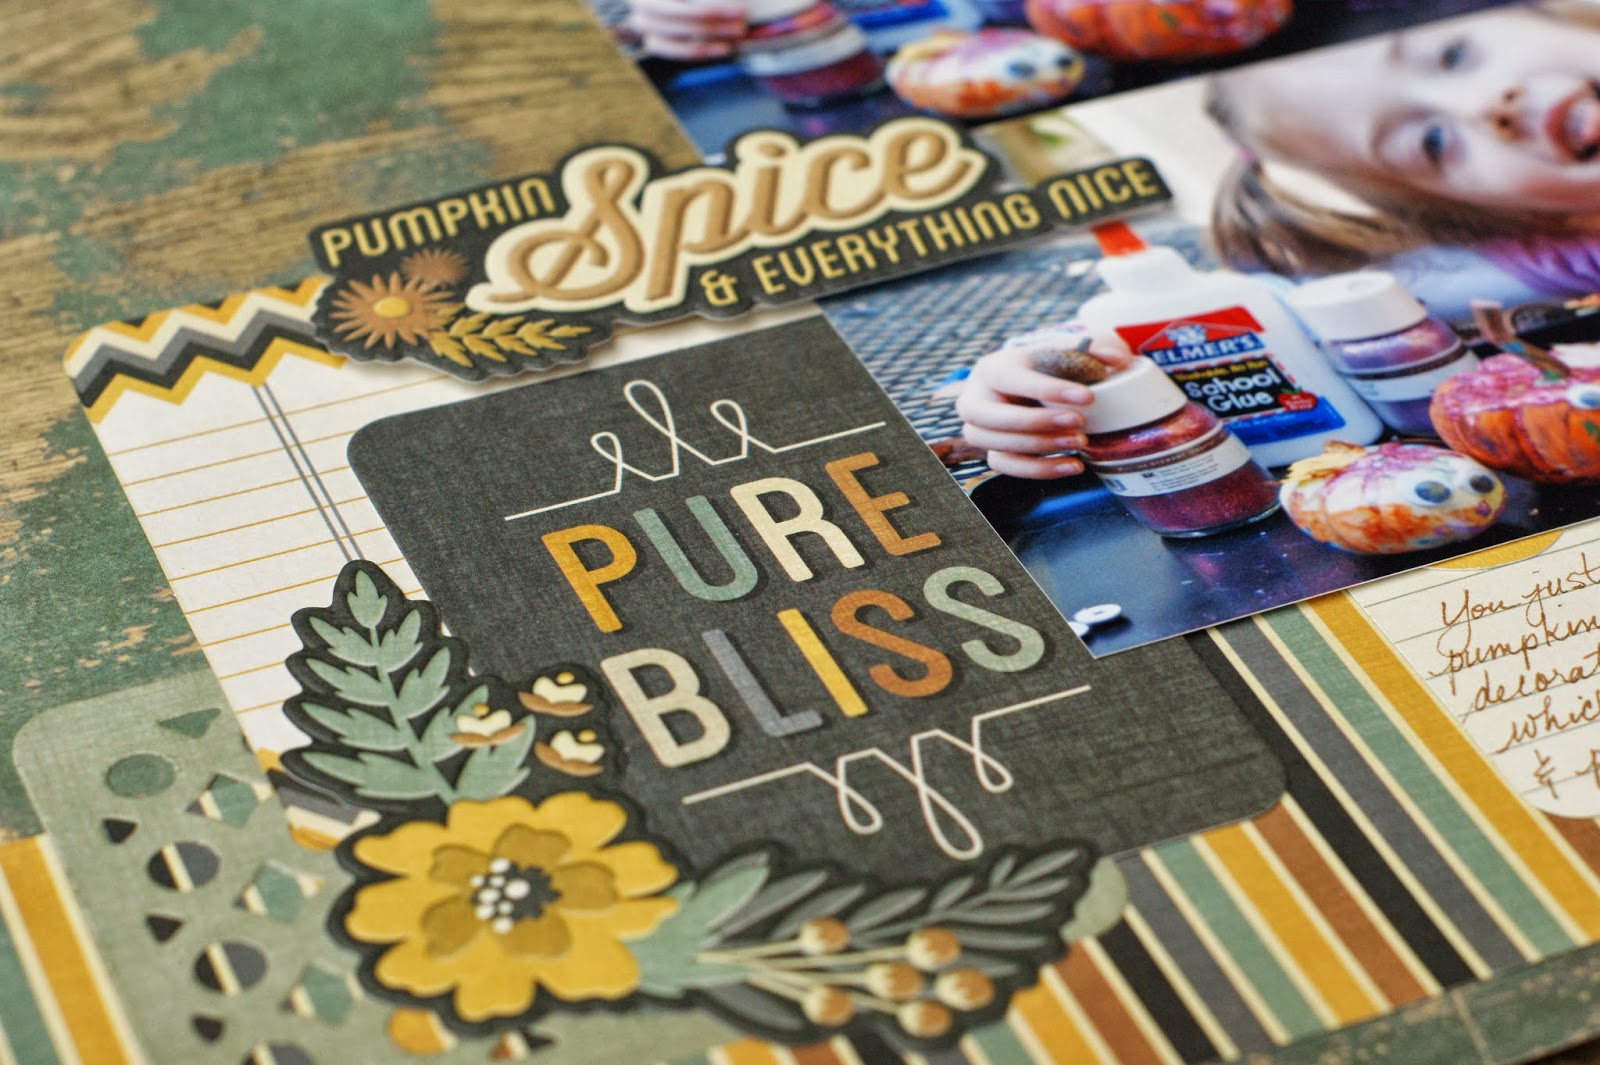
For my second layout I chose the weathered wood sheet for my background and was inspired by the circle die cut card (the weathered blue towards the lower left) to cut a similar circle pattern out of the coordinating golden yellow cardstock.  I used my Cricut for this, but I know the Silhouette also has a similar pattern.  I ended up sewing some zigzag stitches with my sewing machine down the right of the page.  In total, I used 4 cards from the Albums Made Easy Harvest set.  Even if you are not a Project Life-r, these cards look great on regular 12x12 layouts - perfect for layering and using as journaling boxes.  Add a few of those awesome embossed stickers and this layout is "pure bliss."  If you like fall colors as much as I do, you'll want to grab some of this awesome Harvest collection by We R Memory Keepers soon.

As I mentioned, I did create a 3rd layout, but I'm saving it for Friday.  Do you like layout sketches?  Come back on Friday for a Scrapdoodles Layout Sketch Challenge!  You'll have about 2 weeks to play along and there will be a prize (randomly selected from all participants).  I hope you'll join in the fun!

Wednesday, September 19, 2012

Halloween Wreath and Layout

Just got back with wonderful goodies from Scrapdoodles!  They have an awesome selection of fall and Halloween papers and embellishments right up towards the front of the store and, if you're anything like me, you will be standing there a long time trying to decide what to go home with.  :)  Oh this paper addiction!

Anyways, I knew I wanted to create a rolled paper wreath ever since I saw this video tutorial from Graphic 45, and thought a fall or Halloween theme would be great.  With that project in mind, I chose (finally) some double sided papers from We R Memory Keepers' "Black Widow" line.  You can see the whole line here, and of course at Scrapdoodles.  I picked out the "Happy Halloween" embellishment for the middle of the wreath (I added some more paper ovals to give it more "weight") and when I saw the metal charms, I knew I HAD to use them somehow, too.  I added an eyelet to the ends of some of the paper cones for strength and hung the charms with some Tim Holtz jump rings I had in my stash.  Generally, I followed the tutorial from Graphic 45 with just a few changes.  Instead of a chipboard backing, I used a scrap piece of foam board,
since I had that on hand.  I also used a bit of foam board in the middle behind my center ovals and embellishment.  In the tutorial, the paper cones are attached with staples.  I had some difficulty with that, so I ended up using hot glue more than the staples.  I love how this wreath turned out.  An added bonus is how the little charms jingle on the door - love it!

Of course I can't let a Design Team week go by without a layout.  For this week's layout, I chose a few papers from Echo Park's Halloween line, "Chillingsworth Manor."  You can see the whole line here.   Lots of cute and spooky details in this collection!  I took home a sheet with spiders and polka dots and knew I had some cute photos of Hannah with spider cookies that I could use.  My layout includes a combination of lines - Echo Park, some of my leftover scraps from the We R Memory Keepers collections, and some sticker elements from Authentique's Halloween line, "Enchanted."   Man - there is a lot of good stuff out there for all your Halloween, pumpkin, and spider photos and projects!

For this layout, I punched several circles and simply straight stitched them right to the page in a line.  It's a great way to add lots of pattern and texture to your layout.  My title was cut with Echo Park papers.  I used my Cricut and the "Happy Hauntings" cartridge along with some sticker elements from Authentique.  I also used another sticker element (the spider and the fly quote) off to the side and added some Black Diamond Stickles to the two spiders.  At the last minute I added a thin black cardstock frame with distressed inside edge.

I had a few scraps left, so I cut some 3/4 inch by 5 inch strips to make this little paper pumpkin.  I just used brads to hold the strips together and then fanned them out and shaped them into a pumpkin.  With a few more paper scraps and a leaf punch, I added the stem, vines, and leaf.  I could see several of these decorating a table this fall. 
So, while the picking is good, visit Scrapdoodles and pick up some fall/Halloween collection papers.  I hope you have an easier time deciding than I did ;)

Wednesday, August 29, 2012

Harvest Lane Mini and Layout

Lucky Me! Simple Stories is quickly becoming one of my favorite paper companies.  I first discovered them in the Scrapdoodles yard sale (thank you mystery person who discarded that yummy paper for next to nothing!).  Then, when I went into Scrapdoodles to pick up some goodies for Design Team, I was told to look at the new fall line, Harvest Lane, from Simple Stories.  Hot diggity dog!  I LOVE these rich colors, distressed feel, and how easy it is to put together layouts and projects with this coordinating line. My mini came together in no time as did this simple layout.  On this layout, the only non-Simple Stories elements are my photos, a metal bracket and brads (Stampin'Up) and some white thread.  It's fun to layer the coordinating elements.  I really love the little words and images on the sticker sheet and added some dimension to my cluster by backing a few pieces with foam tape.

This line is full of small and large elements that are perfect for layering, which inspired my layered mini album.  I designed it with pages that flip open to reveal more photos and more of the paper's sweet elements.  I love the little bingo cards!
Open once,

Open twice,

and flip open again!
Want to see that again?

Open once,

Open twice,

And flip open again!

I may just have to go back to Scrapdoodles and pick up more of this line...and maybe check out their Christmas line, too!

Wednesday, October 5, 2011

Little Yellow Bicycle's "Happy Fall" Projects

I was lucky enough to pick up some of the new Little Yellow Bicycle fall line, "Hello Fall!" at my LSS, Scrapdoodles, and I "fell" in love.  I love these papers - the colors are rich and vibrant and the details are so wonderful.  Then I looked at the embellishments all hanging happily together, and "Wow!"  I wanted everything!  The best part is that I could see using the embellishments beyond my scrapbook page and onto some fun accessories and home decor.  I first started with my scrapbook page, combining a few of the double sided papers and a strip from the border sheet.  I mimicked that "happy Fall" cluster again in the upper left for my title.  I added some punched circles and some of the fabric and chipboard embellishments.  It came together quickly (so nice when the paper itself inspires the layout design!) and is perfect for any type of fall photos, like these of Miss H. playing in the leaves last year.

 At left are the items I started with - 5 sheets of double sided papers and 3 embellishement packs - fabric, chipboard, and felt flowers.  I knew I wanted to use the felt flowers for hair barrettes and they worked out perfectly.  I also used the 2 fabric buttons on barrettes - too cute!  After I made the barrettes, I decided to make a little hanger for them out of ribbon and a chipboard tree.  I love it and haven't decided if I will keep it or give it as a gift to some sweet little girl :)

 Next on my list of projects with this cute stuff was a little banner for my door.  I dug out 4 pieces of Maya Road chipboard I had and covered them with paper and embellishments.  It was so easy and I love how it turned out!  I did sand the edges of most of the pieces to help them stand out against each other, but other than that, I didn't alter much of anything.  I punched holes using my Crop-a-dile and used medium width ribbon and then a piece of twine to string it together.

If you want to see these projects in person and add some of this line to your stash, I recommend you hurry out to Scrapdoodles (if you're local to Fredericksburg) and pick it up.  I think I may have to get some more, too, before it's gone.