Tuesday, December 24, 2013

Merry Christmas!

Wishing you the very merriest of Christmases and the happiest of New Years!
May you enjoy the warmth, peace, and joy of our Savior's coming.


Wednesday, November 27, 2013

Easy Christmas Countdown

Are you ready for December?  It's right around the corner so I'm sharing a couple of quick and fun projects to help you count down the days until Christmas.  Scrapdoodles has a great selection of Christmas papers and I wanted to highlight one of my favorites - Echo Park's Reflections Christmas. There are so many beautiful and versatile pieces in this collection - I love the vintage images, traditional colors, and variety of patterns.  Some of the sheets include border strips and project life style cards. Check out the collection here online and then stop by Scrapdoodles to see them in person and pick out all of your favorites.  One of my favorite sheets is the North Pole map paper.  I used it as the background for a "Tracking Santa" layout.  Did you know that NORAD begins counting down and tracking Santa on December 1st?  Check out their website HERE and add it to your family countdown activities.  All you'll need to do is snap your photo of the kids at the computer and add it to your layout with your journaling.


The second project I am sharing is a simple countdown made from a 5x7 inch frame.  To make this project, layer 3 rectangles of Echo Park Reflections Christmas papers: red base layer cut to 5x7,  then green layer cut to 4x6, and on top of that a patterned piece cut to 3 3/4 x 5 3/4 inches.  Toward the bottom of this piece layer several stickers, including letter stickers "days 'til".  Put this inside the frame.  Outside the frame I added the large Christmas tag sticker with twine.  To hold the countdown cards, attach a clothespin (dyed red and glittered) to the outside of the frame at the top.  I used foam dots to support it over the glass and hot glue to secure it to the frame. Once the frame is done, you can set it aside and work on your countdown cards.


One of the collection sheets includes a set of numbers 1-24.  I cut them apart and used these numbers on each of my cards.  I cut apart the Echo Park 3x4 cards from the large sheets and added more 3x4 cards cut from various papers to total 24.  Then I used additional stickers and papers from the collection as well as additional items from my Christmas stash to embellish each card.  Each card is different and fun!  Now I can display the frame and put up a new card each day as we countdown to Christmas!

Monday, November 18, 2013

Sketch Challenge - November DCWV

Love DCWV's monthly sketch challenges! This is a great sketch for showcasing one photo and some awesome papers.
 

I used the White Ginger stack for my layout. The bright blues really bring out the blue in my girl's eyes! The large feathery element is from the stack - I just fussy cut it out and added some bright yellow pearl dots.  The title is from the Cricut Artbooking cartridge.


Monday, October 21, 2013

Cricut: Christmas Village Online Class now Open!

http://www.mycreativeclassroom.com/course/info.php?id=709
Course Description: In this course, we’ll take an in depth look at Cricut’s Christmas Village Seasonal Cartridge and create a variety of projects for all crafting levels. This cartridge contains 50 silhouette-style images with simple and old-fashioned appeal. Many of the images are intended to create 3-D projects, but a lack of included instructions has stumped many Cricut crafters. Has this cartridge been sitting in your stash for awhile because you just don’t know what to do with it? If you’ve been feeling the same way, go get that cartridge out of the cupboard, and come on into this classroom, because we are about to create some awesome projects! Join me for this 4-week class and we’ll clear up any confusion about this cartridge and create several unique projects including a Christmas countdown village display with treat boxes (yes, this cart can do that!), a framed nativity project, cards, a layout, and more seasonal and alternative project ideas.I’ll offer assembly, longevity, and storage tips so that your creations last more than one season. *NOTE: This course has an advanced skill level. Students should come to class already familiar with their Cricut machine. Specific images and cut sizing will be shared. Knowledge of how to use a Gypsy and/or Cricut Craft Room is beneficial, but not a prerequisite for this course. If you do not already own this cartridge, it is available for purchase at local and online retailers and is also available for digital download into your Cricut Craft Room. 

Class Outline 
Week 1: We’ll begin with a cartridge overview and get right into one of the more time-consuming projects: the 3-D village with treat boxes. 
Week 2: We’ll continue with our village display and accessorize it with people figures and a stand-alone ice skating rink display. 
Week 3: An appealing feature in this cartridge is the nativity display.This week we’ll create two projects using nativity cuts – a framed piece (a great gift or home décor item) and a small-scale shadow box project. 
Week 4: In our last week, we’ll see what else this cartridge has to offer. Projects will include cards, a layout, and one more silhouette project – this time with vinyl.

Wednesday, October 16, 2013

Autumn Layouts with We R's Harvest Collection

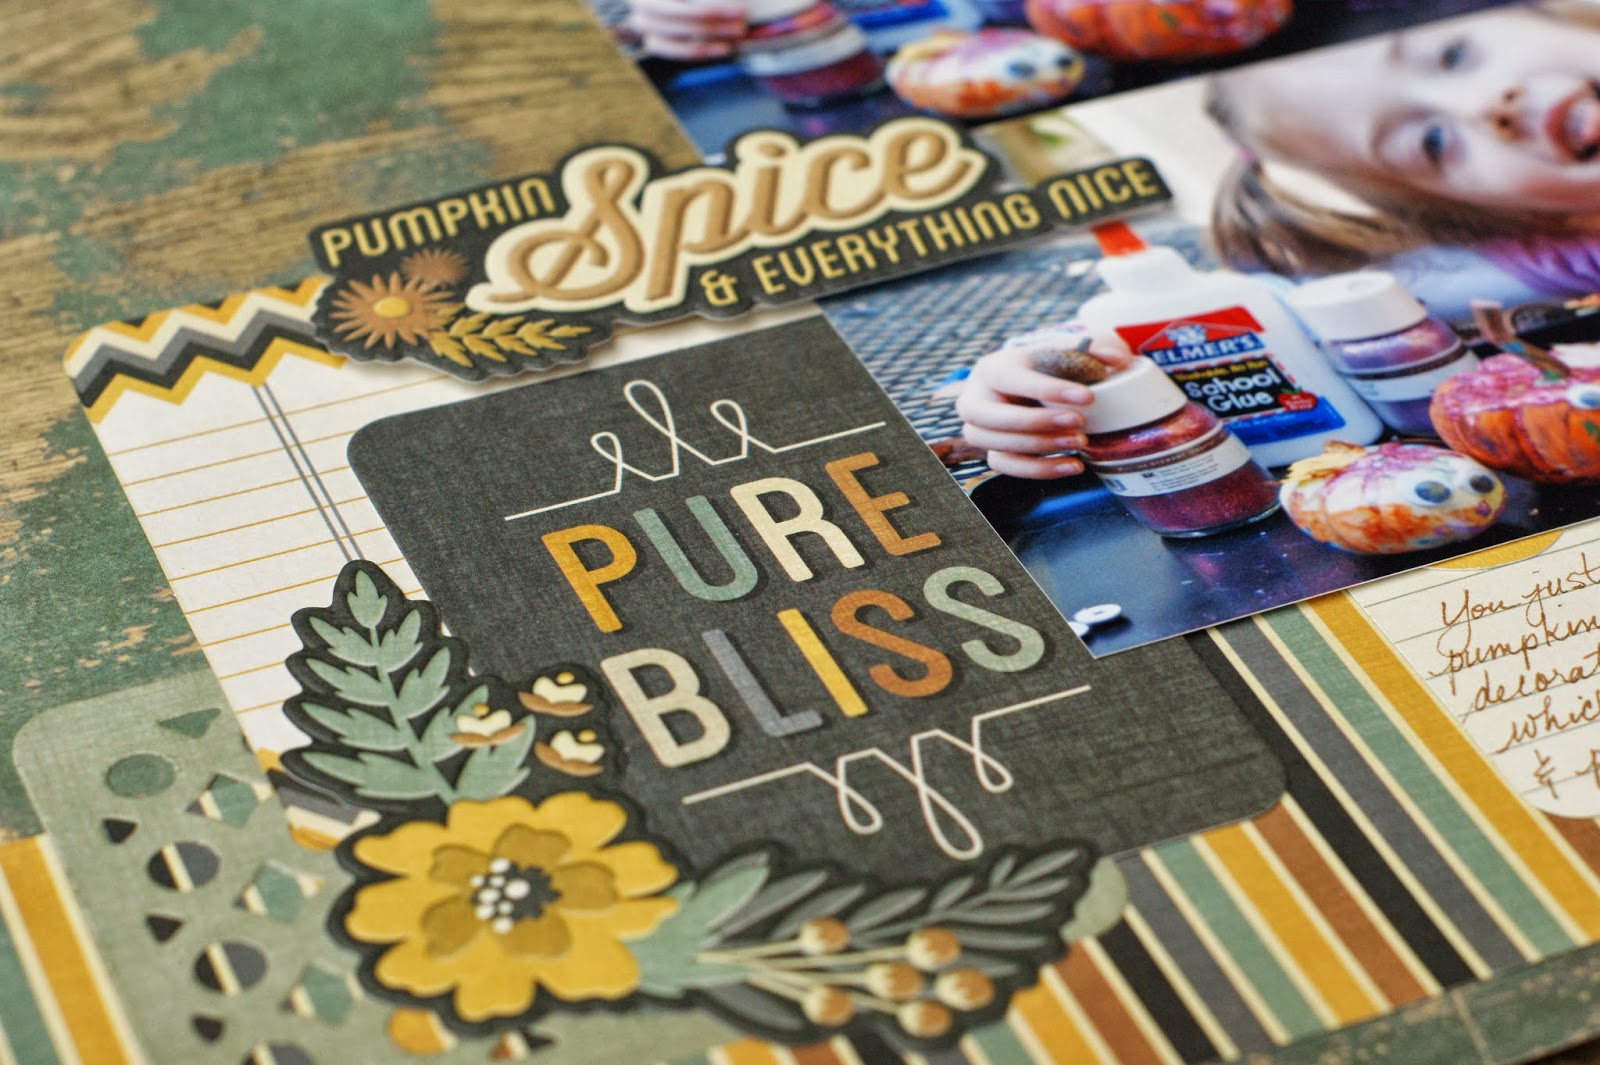
Oh, how I love the fall!  I love the tastes, the smells, the cooler temperatures, the beautiful colors!  It's my favorite season by far.  We R Memory Keeper's new "Harvest" collection is perfect for highlighting your fall photos and projects.  I love the warm yellow mixed with steely blue and orange and black.  This collection also has some great patterns - weathered wood, chevrons, and more - a little bit "old" and a little bit "modern."  I've created two layouts to share with some Harvest papers and embellishments picked up at Scrapdoodles.  Come back on Friday for a third layout and a challenge for you!

For my first layout, I began with the awesome orange chevron paper. I love how this paper is lighter at the top and gradually gets to a darker orange/brown at the bottom - a great ombre effect that really adds interest to the layout.  The large 4x6 card is from the Harvest Albums Made Easy collection (must get this!!!).  I embellished the bottom title strip (cut from one of the 12x12 sheets) with a border and simple twine threaded through.  Notice how I notched the ends?  This adds interest and keeps my twine exactly where I want it.  The "who, when, where" journaling bits are from another strip from that same 12x12 sheet.  I added a few embossed stickers to complete this layout.
For my second layout I chose the weathered wood sheet for my background and was inspired by the circle die cut card (the weathered blue towards the lower left) to cut a similar circle pattern out of the coordinating golden yellow cardstock.  I used my Cricut for this, but I know the Silhouette also has a similar pattern.  I ended up sewing some zigzag stitches with my sewing machine down the right of the page.  In total, I used 4 cards from the Albums Made Easy Harvest set.  Even if you are not a Project Life-r, these cards look great on regular 12x12 layouts - perfect for layering and using as journaling boxes.  Add a few of those awesome embossed stickers and this layout is "pure bliss."  If you like fall colors as much as I do, you'll want to grab some of this awesome Harvest collection by We R Memory Keepers soon.

As I mentioned, I did create a 3rd layout, but I'm saving it for Friday.  Do you like layout sketches?  Come back on Friday for a Scrapdoodles Layout Sketch Challenge!  You'll have about 2 weeks to play along and there will be a prize (randomly selected from all participants).  I hope you'll join in the fun!

Friday, October 11, 2013

Leaf Pile Jumping!

Just got into last year's photos of fall and this set of Hannah with her silly hair makes me smile.  Looks like it was pretty warm last year when these photos were taken.  Unfortunately this week it's been rainy and chilly.  No leaf jumping (yet) for this girl!
 I used Bella Blvd's Halloween/Fall collection for this layout.  The leaves and title were all cut with my Cricut.
Happy Fall, Ya'All!

Tuesday, October 8, 2013

Creative Scrappers Sketch

I think sketches are a great way to jump start your scrapbooking layouts.  While I don't always follow sketches to the exact detail, I love how a good sketch can inspire lots of different layouts by focusing on one or more elements and bringing them to life in a new layout.  Creative Scrappers recently started up their sketch challenges again and I played along for Sketch 252.  Here's the sketch: 
 
I love so many individual elements in this sketch: paper strips, triangle, chevrons, and the photo cluster.  I repeated these elements in my layout.  Here's my take:
For this layout, I layered a trimmed down sheet of white grid paper from Bella Blvd on top of a blue sheet of plain cardstock.  I used several strips and patterned paper pieces from Bella Blvd's "Trick or Treat" Halloween collection to create layers at the bottom of the page.  Obviously, I did not follow the sketch exactly.  I liked the idea of 4 square photos in the middle of the page - so I focused on that element, cropping my photos to 4x4s and arranging them in the center.  You can see that I also used the layered strips idea, but changed the direction and location of them on the page - mostly because my photos are much larger than what the original sketch called for and the strips would have been lost behind the photos, so I created the cluster of elements to the bottom right.  Additional elements that I pulled from the sketch include the use of triangles (loving them lately) and the chevron element (represented by the colorful chevron borders I fussy cut and the small file "Today is Candy Day" element).  I love how this layout focuses on the photos, yet has plenty of room to highlight awesome papers.  Do you enjoy sketches?  Check out Creative Scrappers - you still have time to join in the fun!

Bella Blvd Layouts

Just finished a couple cute layouts with my Bella Blvd stash!  I'm a sucker for the bright colors and fun patterns, especially in the Daily Chevies and Snapshots collections. Love these "action" photos of Hannah from last summer.  She is always moving!

I found this photo strip from a wedding a couple years ago.  The doodle paper and camera strip complements the silly photo booth strip.  Love this one!


Wednesday, October 2, 2013

My Scrap Happy Craft Room

Do you have a dedicated space to craft? I am so blessed to say, "Yes! I have a craft room!" It makes me super happy. It's purple. It's roomy. My daughter has a little table next to mine. It's the former dining room, so it's just off the kitchen and family area and I can be "in" the mix of the house and not off in some remote corner when I want to craft. I can leave projects out while I'm working on them to take care of other business. I can have a friend or two crafting with me. My craft room is awesome and I am very blessed. Take a peek... what do you think?

Saturday, September 28, 2013

It's Hump Day! DCWV Stackaholic Challenge

I created this layout with DCWV's September Stackaholic sketch.
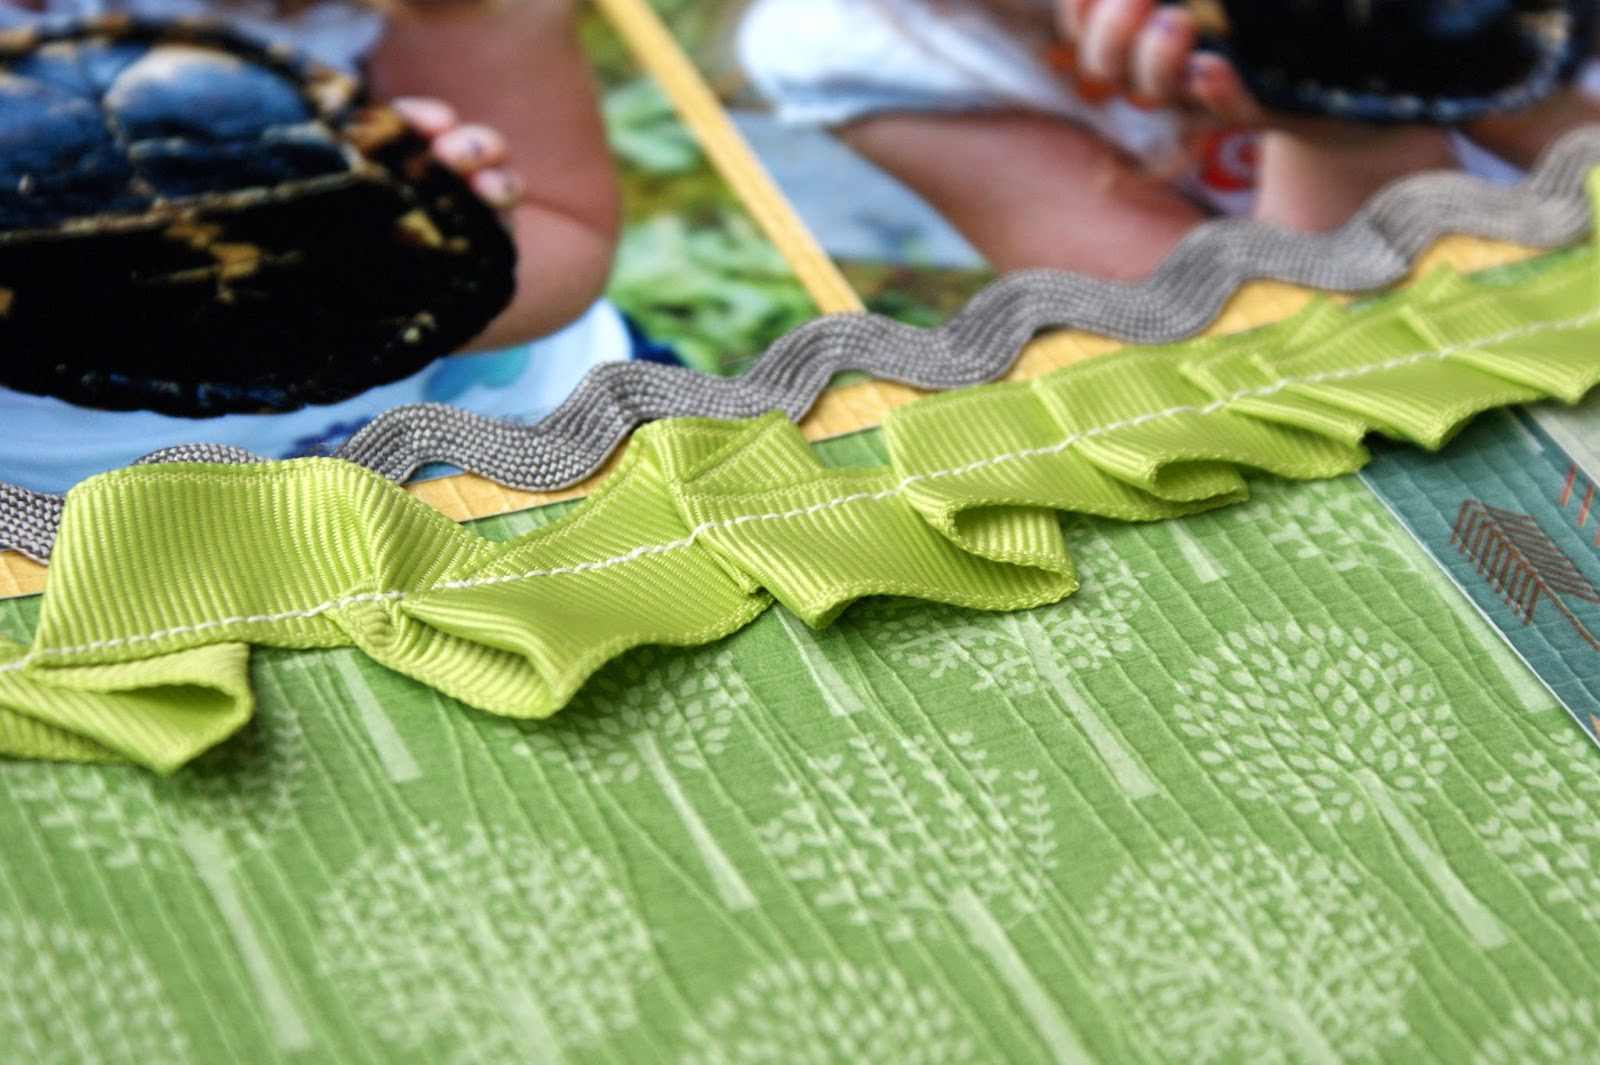
I love how it turned out!  These photos are from a fun day at the zoo in WI last summer.  Hannah's Auntie Dee treated her to a ride on a camel and I couldn't resist the title "hump day" especially with the crazy "Guess what day it is?" commercials these days.  I used the Modern Meadow stack - such pretty yellows and rusts paired with that greyish blue in this stack.  And the glossy background paper - so pretty!  All of the papers are from this stack (except for a bit of brown cardstock).  I cut most of the die cut elements and title from my new Cricut Artbooking cartridge (quickly becoming a favorite cartridge, by the way!).  I added a bit of inking to separate the patterns a bit more and also threw on a few sequins and confetti dots.  As you can see I changed a few things about the sketch, but kept the overall design of two columns in tact.

Thursday, September 26, 2013

Happy Halloween Wreath

I just had to pick up this cute paper by Bella Blvd.  I mean, LOOK at those OWLS!  They make me smile. And so does this little paper wreath I made with Bella Blvd. papers.  Start with a flat cardboard form (I used a cake round) and cut out the middle so you have a flat ring.  I cut 3-4 inch strips of varying widths from all the cute patterned papers and arranged them around the wreath, overlapping and adding until every spot was filled in. Notch the outer ends of each strip. Add a row of black sequins to the middle (mine are from Teresa Collins).  Cut several 3 inch squares from the black star patterned paper and add these to the back of the cardboard form.  Adding them to the back of your form (so the cardboard is between the squares layer and the strips layer) helps give a little dimension to your wreath.  Position them with points out and overlap them to fill in space.

Finish your wreath with a few extra embellishments from the collection, especially the owls!!  Fussy cut some of those adorable owls and add them around your wreath with pop dots.  Cut the "Happy Halloween" strip and add that on a diagonal.  Fasten a ribbon hanger to the back and you've got the cutest wreath in town to hang on your door!

Thursday, September 12, 2013

Vintage Sewing Pattern Paper Cards

I recently visited a friend who "unloaded" a bag full of old sewing patterns. I was happy to accept them and she was happy to get rid of them. I love the idea of mixing in the pattern papers with other items and couldn't wait to find a fun use for them.  I am currently in a "use what I have" mode and luckily remembered some older Cosmo Cricket papers with a sewing theme. (It's called Material Girl in case you're wondering.)   
Sew, (ba-dump-bump) after I returned home with my bag of sewing patterns, I found my papers and got to work making these 3 quick cards.  (How do you like the sewing machine??? This gem was my mom's.)
All the cards started with a kraft cardstock base and I used mainly the Cosmo Cricket collection I dug out.  I had kept the collection together and it included some chipboard stickers and fun borders and other paper elements.  For this first card I also used some Tiny Type letter stickers and a short piece of thread that I wound around the chipboard spool.  I love the piece of sewing paper against that gorgeous green vintage-inspired scrapbook paper.  The tape measure bit is also paper (which I crinkled up and inked). 
 For my next card I created a flower like embellishment with a chipboard button and a small piece of sewing pattern paper. A few more additional paper and chipboard pieces, SRM sticker border stitches and a stamped sentiment finished it off.
 My last card is a 5x7 size and this time I made a skirt for the patterned paper lady by gathering a larger piece of sewing pattern tissue.  With a little "belt" of sticker border and chipboard flower, she's all ready to go out.  The sentiment is from the CC paper and I added a bit of SRM sticker border stitches. 
I have quite the stash of patterns to play with now, so I'll need to think of some more ways to use it up.  I may make some fun tissue flowers next.  Fun, fun, fun!

Saturday, September 7, 2013

Welcome Home Card

Here's a cute card I just finished for friends moving into a new house.  The patterned papers and hello. sticker are all from Bella Blvd.  How cute (and perfect) are those little houses?  The sweet smiling sun was cut from my Cricut using the Create a Critter 2 cartridge.
Enjoy your day!


Wednesday, August 28, 2013

DCWV Stack-a-Holic Sketch Challenge for August

I just finished a cute layout based on DCWV's August Stack-a-holic Sketch challenge.  You can see the sketch HERE on their blog.  I love their stacks and just found a couple new ones on sale.  This layout is created with the new Green Stack.  The texture of the paper in this stack is so unique.  It has woven fibers, but is still easy to cut with regular scissors and trimmer.  These two photos of my daughter and her little turtle friend (poor thing was tucked deeply into his shell) are complemented perfectly with the fresh green patterns and nature motifs.
I sewed the green ribbon directly onto the paper with my sewing machine.  I haphazardly scrunched it under the needle as I went.  I really love the fun and frilly look.
 You can really see the woven fibers of the papers in these two closeups.  The blue paper with the arrow patterns is really fun, too.  I can't wait to use more of this stack.

Monday, August 26, 2013

Altered Notebook with Cricut Artbooking Cartridge

I caved and bought the new Cricut Artbooking Cartridge.  And I'm so glad I did.  I haven't had a chance to play with it as much as I'd like, but I love all the overlays and extras on this cartridge.  I also have the coordinating stamps from Close To My Heart and can't wait to add them to my layouts and projects.  Here's a quick notebook re-do that I recently completed with this cartridge.  All the cuts are from Artbooking.  I added number stickers from a leftover Teresa Collins sheet that I had, and then tied some ribbons around the spirals.  I can't wait to do more!

Thursday, August 22, 2013

Design Team Wednesday at Scrapdoodles - Fun Layouts with Bella Blvd.

Hi Everyone! It's Design Team Wednesday over at Scrapdoodles and I have some super fun layouts to share with you!  Bella Blvd is moving up as one of my favorite lines with their recent releases.  Check out their summer release catalog for more inspiration and then hop on into Scrapdoodles (or your favorite lss where you are) to get your hands on these fun collections!  They are sure to inspire creativity.

Today, I'm sharing 3 layouts I created with the Snapshots line - I love the playful elements in this line, especially the doodling and the cameras.  The little camera icons in the papers are too cute and I couldn't wait to get them home from the store to play with them.  For this first layout I layered lots of elements creating a bit of a playful and colorful design.  It's actually a bit on the busy side for my usual style, but I couldn't stop adding elements - too much fun!  Several pieces were cut from the sheet of border strips.  The doodle card was also from a full 12x12 sheet and I colored in some of the elements using my watercolor pencils. Another fun element on my layout is simply turning over one corner - see it in the upper right - and using that area for another cluster of embellishments.
Below my photo, I cut a row of cameras and then fussy cut a few of them to pop off the page using foam dots.  This is another fun technique to try on your next layout.

I really like the use of black alongside the bright colors - and for my next layout I emphasized the lime green and offset it with some of those black elements. 
 Again, I had fun playing with some of those cute cameras!
By this time I was running out of papers- I had only picked up 4 sheets plus some die cuts and stickers (have to go back for more, oh darn), but had enough to pull this last layout together.  I think the fun papers are perfect for this fun and silly photo of my husband and me.
I hope you've been inspired to check out this line and more from Bella Blvd.  You won't be disappointed and I can't wait to see what you create!

Wednesday, August 21, 2013

We R Memory Keepers Guest Post ~ Fun with Storytime Collection

It's such a thrill for me to be a guest designer over at the We R Memory Keepers blog.  If you are visiting me from over there - Thank You and Welcome! This trio of cards is featured on the blog today and you can find my instructions there as well to recreate your very own set with this adorable collection of papers and embellishments.
I also created a layout and door hanger with the goodies that We R so generously sent me.  You can see the whole collection here.  If you're local, be sure to stop in at Scrapdoodles in Fredericksburg, because I know they have this collection in stock.

When I first saw the collection, I immediately thought of library trips and reading stories with my young daughter.  We love to read together and while not everything we read is a "fairytale", this paper just speaks to the special kind of imagination that is discovered only through reading books.  When I started going through my photos I found these two sweet pics of our girl "reading" (she's 3 here and not yet reading on her own) Peter Rabbit to her stuffed Peter Rabbit toy.  I just love the little story characters featured on the paper, and couldn't help fussy cutting around the wolf so that he could hang a paw over the storytime die cut title.

Lastly, I created a cute wall or door hanger.  I started with a chipboard star covered in the orange patterned paper from the collection and one of the large die cuts attached to the back.  A ribbon hanging down features some of the little storybooks cut from the paper and another die cut at the bottom.  On the star I folded a strip of paper to mimic a ribbon and adhered the die cut letters.  Now it's all ready to hang up whenever we need a little storytime break!


Saturday, August 17, 2013

Wedding Album Layouts

I recently completed a wedding album for my oldest sister and her new husband.  I was able to bring it and give it to them in person when I returned to Wisconsin for a visit.  I love watching people look through their new albums - it totally gives me the warm fuzzies!  It's really something special to be able to use your gifts and bring happiness to others.

Here are a few of my favorite pages from the album.  I just love this first page - such a cute photo of the couple and the gold Teresa Collins paper is magical!  Throughout the album I used primarily Teresa Collins, Authentique, and DCWV papers and of course my Cricut.  Enjoy!