Showing posts with label American Crafts. Show all posts

Friday, April 4, 2014

Spring Birthday Card

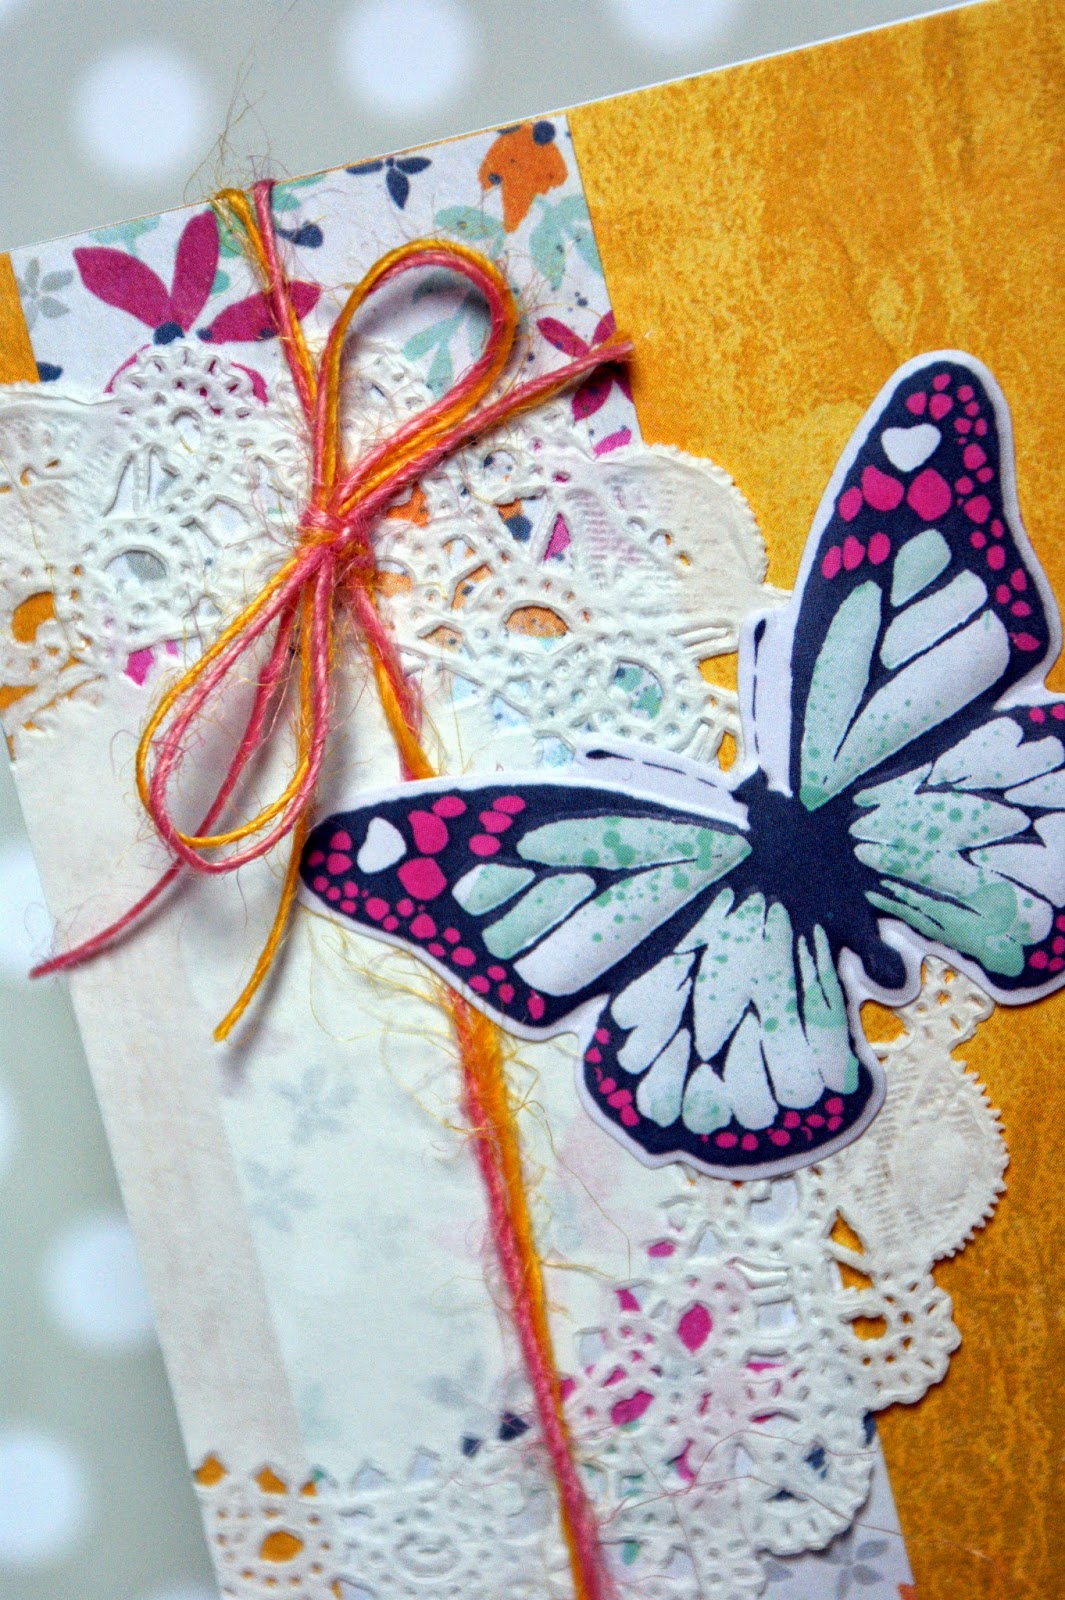
SRM is hosting a brand new challenge blog, HERE.  The first challenge is anything that CELEBRATES!  I have a few birthday cards that need to go out this month, so it was easy to play along - especially when SRM makes the perfect clear stickers for cards!  I also had fun digging into some of my new Inked Rose collection from We R Memory Keepers - perfectly spring-y.

I know Susan at SRM loves doilies (and so do I), so I used a small doilie on this card.  The butterfly is from the We R Inked Rose coordinating stickers.  The twine is American Crafts and the sentiment is, of course, SRM.  (It's from the Thinking of You Sticker Sentiment sheet.)


Make sure you check out SRM's blog for more great inspiration!

Tuesday, March 4, 2014

Circle Punch Border

I'm always looking for a quick way to dress up a layout and showcase beautiful patterned papers.  One technique I often turn to uses my trusty old circle punch.  It's a great technique for using up scraps of paper and livening up a layout. Simply punch circles from your coordinating scraps and layer them down the side (or top or bottom) of your layout for a quick and colorful border.  Add a block of photos, your title, and journaling, and you've completed another memorable layout.


These papers are from an older DCWV stack, Fun in the Sun Glitter Stack.  The title includes mini letters from Cosmo Cricket and American Crafts chipboard letters.

Try these ideas for working with paper scraps and punches:
This Week's Topic at My Creative Life 2014 is Punches!

If you're looking for even more ways to use punches and paper scraps in your scrapbook layouts, as well as use up more of your scrapbook stash, you'll want to check out my class at My Creative Classroom.  It's packed full of sketches, layout samples, and lots of ideas for digging into your creative supplies and using what you have on hand to create awesome layouts.  
http://www.mycreativeclassroom.com/course/info.php?id=828

Saturday, February 8, 2014

Love These Layouts!

It's February and love is in the air...and on my craft table! Today I want to share two recent layouts that I really love.
First up: "Me & You."  Even thought this photo of my husband and me is out of focus, I love the candid nature of it and that we are both smiling and looking happy.  Sometimes those imperfect photos make great layouts! This one uses some of the new Fancy Pants "Be Loved" collection.  I really was drawn to the water color feel and soft palette.  So many little elements are available with this collection, too.  I altered my background sheet by drawing a large heart, sewing the outline with pink American Crafts twine, and then adding some paint and pink chalk to the inside.  I also added twine in other places - the tags and several cross stitches on the left side.  The "me & you" sentiment was cut with my Cricut - Graphically Speaking is an old cartridge, but still one of my faves.  The pink glitter border strip is from Teresa Collins.

I picked up some new My Minds Eye yesterday at Scrapdoodles and had a little fun.  I also recently added a couple of new cartridges to my collection, so wanted to use them right away, too.  The beautiful background sheet is from MME's Now & Then, "Dorothy" collection.  The heart doily (LOVE) was cut with my new Edge to Edge Cricut cartridge.  The title is also from a new cart - Small Talk Frames and Tags.  The rest of the elements are MME.  I'm really loving the phrases and mini letters available with this collection.


Thanks for visiting! I hope you have a LOVE-ly day!


Tuesday, February 4, 2014

You're OWLsome! Thank You Cards


Hannah just turned 5!
She enjoyed a My Little Pony themed birthday and lots of wonderful gifts from lots of wonderful people.  
I made these cute cards for her to write her thank yous.
This adorable owl is found on the Hoot n' Holler Cricut cartridge.  
The numbered cards and patterned paper are both from American Crafts.
The cute sentiment stamp is from a set by Jillian Vance Designs.  I picked the set up at my favorite store, Scrapdoodles in Fredericksburg.  I plan on using some more of these cute sayings for Valentine's Day.

And here's the cutie pie Birthday Girl!


Wednesday, July 24, 2013

Birthday and Anniversary Cards

July is a busy month for our family.  We have several birthdays and anniversaries to note, so that means cards to give or send out.  Here's a few of the cards I made for this month.
DCWV's Vintage Collector Stack, SRM Sticker, We R Washi, American Crafts Twine

DCWV's sunday Afternoon Stack, SRM Sticker, American Crafts Twine

DCWV's sunday Afternoon Stack, Airplane cut from Cricut B is for Boy cartridge

Lillibee Design paper, My Mind's Eye tickets, SRM stickers, American Crafts twine

DCWV Vintage Collector Stack, silhouette cut from Cricut Sweetheart Cartridge

Wednesday, February 6, 2013

Everyday Love with Chipboard Masks

This week's Scrapdoodles Design Team post is all about LOVE!  I believe in documenting the everyday kinds of love in my scrapbooks - not just the big events and milestones.  This week I'm using two different "love" lines now available at the store - American Crafts (XOXO) and imaginisce (Love You More) and some really fun and versatile chipboard and acrylic accents from Maya Road.  The American Crafts and imaginsce lines went really well together so they are combined in my two layouts.  Lately, I've been experimenting with misting and when I saw the days of the week chipboard accents from Maya Road (which, by the way, are on SALE this week and next at Scrapdoodles!) I immediately saw the page in my head.  I simply laid out the chipboard on a full sheet of 12x12 paper in a sunburst pattern and used my Tattered Angels Mist (Red Velvet) to cover it.  The mist dries fairly quickly, so I didn't have to wait long to pick up my chipboard and admire the negative left on the page.  I added several strips of patterned paper from these collections behind my photo to create a "mat" for it.  My title was cut with my Cricut (Graphically Speaking).  I also added a clear acrylic heart to my page.  I adhered tiny gems around it to emphasize its shape.  There are also several accents around the page that were cut from the patterned papers or found in my stash.  I finished it off with a couple of sentiment stamps (MME).

My second layout is similar in theme, but I really wanted to use the actual chipboard shapes this time.  I love how the mist covers the chipboard so nicely!  I adhered them to my page using glue dots.  For this page I also added another masking and misting feature, this time using another one of the clear acrylic elements from Maya Road (love).  I also did a little bit more heavy dripping on this page, which I really like.  The hexagon patterned paper from imaginisce is awesome.  Here I cut out a few pieces and arranged them diagonally behind my square photo.  For extra dimension, I wrapped twine around the photo and mats.  The strip at the bottom of the page is also imaginisce and is sewn down at the bottom edge.  I hope you're able to come into the store to see these two layouts!  The misting was new to me and I really love that it's so forgiving in terms of technique.  There are a lot of possibilities.  Did I mention that Maya Road Chipboard is on sale?

More details:

And one last project for you that was so easy to put together!  Scrapdoodles has these cute clear acrylic pillow boxes in several sizes.  All you need is a little patterned paper and embellishments to create some super cute Valentines!  Stop by and see my cute version - but don't eat my m&ms!  Then find some cute love papers and craft up your own version to give to your sweetie.


Wednesday, January 11, 2012

New Years and Valentine Layouts

Do you make New Year's Resolutions?  I like to think about the year past and set some goals, so I guess I do make resolutions.  This year I decided to create a layout to reflect some of these goals of mine.  I picked up some fun American Crafts products for this layout.  I normally scrap very girly pages so it was a nice change of pace to pick up some selections from AC's CHAP line.  I came home with three sheets of double sided papers and a pack of chipboard shapes.  I used my Cricut (Jubilee font and Printing Press numbers) for this page and journaled the rest in pen.  The "2012" in the letter "O" is cut from a calendar.  I'm thinking I'm going to hang this layout so I can be reminded of my New Year's thoughts and goals.

While I was at my favorite scrapbook store - Scrapdoodles in Fredericksburg - I was "lovestruck" by the wonderfully sweet selection of Valentine's Day papers and embellishments.  The neat thing about a lot of these papers is that they can be used in all sorts of layouts.  I could see many of these sweet sentiments in baby layouts, anniversaries, wedding, and in my layout here - just a fun shot of my daughter on the eve of her 3rd birthday.  For this layout I used 2 patterned papers from We R Memory Keepers "Love Struck" collection.  Also from this collection you can see one of the super adorable bottlecap embellishments (I think I may have to make a hair bow for Hannah with one of these) and two of the tags or mini cards.  I am also using some cute ribbon from Pebbles.

Check out the sheet of tags - they are so cute!  
 I used two on my layout and then made two quick bookmarks.  I added a little ribbon and then adhered a triangle pocket on the back of the tag so it sits snuggly on the corner of my bookpage.  I'm thinking I will make a few quick and easy cards with the remaining tags on the sheet.  One of the tags says "Love at first sight" and I think it would be perfect on a baby layout or new baby/baby shower card.


Tuesday, June 21, 2011

Old Hunters, Sleeping Babies, and a Bit of Baby Love

I've got 3 very different projects to share with you today - 2 layouts and a quick door hanger.  The first layout is made with American Crafts new "Campy Trails" line.  These papers are CUTE!  The colors are wonderful and the patterns are so much fun.  I really like the wood grain and the cute critters.  We do not camp often, but these papers are great for all kinds of activities.  My family has a long tradition of hunting.  I came across this old photo of my husband's grandfather with a really nice buck.  The "Campy Trails" papers really played on the outdoors theme.  For this layout, I actually cut one 12x12 sheet, flipped it, and sewed it back together.  I love double sided papers!  The circle pattern and dark brown is from another single sheet.  I cut the title with my Cricut (Designer's Calendar Font).  The photo "frame"  was made with a Stampin' Up corner punch.  I didn't have a round journaling block stamp, but wanted to repeat the circle shape, so I made my own using a masking technique.  First I cut a circle from a scrap of paper.  I positioned the cut-out sheet where I wanted my journaling block to go and used a rectangle stamp (SU) to stamp my journaling lines.  With this technique, it's easy to get the lines perfectly in a circle (or whatever shape you'd like).    Super easy!  I added a few of the coordinating fabric brads from AC to complete the layout.
I had one more sheet of Campy Trails double sided paper and decided to go in a completely different direction just to show you that these papers aren't just for camping and outdoors photos.  I really liked the green and blue shades and the star pattern on the blue side gave me an idea.  I had a few chipboard stars lying in my stash, so I covered two with the green and blue patterns.  I adhered them together with glue dots, punches a hole in each star tip, and inserted a wire hanger.  I covered the wire with little bits of ribbon and also used more of the fabric brads.  I cut the "Nap Time" sentiment with the Baby Steps Cricut cartridge.  It turned out pretty cute - a nice little something to hang on the door of baby's room so everyone knows when the baby is sleeping.   
The last layout I'm sharing with you was made with papers from Cosmo Cricket.  I actually cut apart the colored circles from one sheet of patterned paper to create a grid on the base layer.  Before adhering all my pieces, I used distressing ink and a make-up sponge, as well as a grid-type rolly stamp for more distressing.  Some of the pieces are from a bunch of older CC pieces I had in a box and some are from the newer "Odds and Ends" line.  I love these sweet pics of my daughter and her baby dolls.  If you want to see these layouts and project in person, stop by the store where I got my papers: Scrapdoodles.  While you're there, check out the American Crafts and Cosmo Cricket lines - they will make you say, "Yummy!"

Monday, May 23, 2011

Spring Flowers, Caterpillars, and Canning Jar Gifts

So much fun to go the Scrapbook Store and pick out pretty papers.  So much more fun to pair them with favorite photos and create a visual memory on a scrapbook page.  I love the flowers and soft colors of this line from American Crafts.  Who couldn't resist these pretties with sweet names like "My Darling," "Thing of Beauty," and "Neato"?  Check out the rest of the "Peachy Keen" line at their site.  I thought I was all clever when I used the barcode strips (so cannot even think about letting them go to waste!) but I visited the American Crafts blog today and found out they're having "Barcode Strips Week!"  So much for thinking outside the box :)  On this layout, I also punched the title from little letters on the paper sheet called "neato" and made my own cute yarn flowers.  I hand-drew and cut out the flower shape (you could cut a shape from your Cricut, too) and then ran it through the xyron to made it sticky.  It was just laying down the yarn and sewing on a button after that.  Easy Peasy!  Oh, that's another one of the paper names from this line!
 
After making the layout, I used more pieces to create some mini cards.  For each little card, I also cut a shape from my Cricut (Storybook cartridge) for the center.  I made envelopes to match and put them in a canning jar as a gift.

I also made more cute cards using kraft cardstock and leftovers from a layout using a couple of sheets of Jillibean Soup kraft patterned paper.  This layout and line of papers was really what gave me the idea to put cards into a canning jar in the first place!  My layout and cards use Chilled Strawberry Soup - "Fresh Lime Juices" and "Light Corn Syrup".  I also used a bunch of the house, tree, and other corrugated cardboard shapes, which I inked to give them more definition.  The green trim is cardstock punched with a Fiskars edge punch.  The cute little worm is from Create a Critter cartridge, the font is from Jubilee, and the jar is a cut from Kate's ABCs.  The other die cuts are from one of the coordinating paper die cut sheets from Jillibean Soup.  It's called "Pea Pod Parts" and has a lot of canning references, thus the gift idea of putting itty bitty notecards into a canning jar.  I used wide-mouthed jars so the cards are easy to get in and out.  I made a set of 6 using the Jillibean and a set of 8 using the American Crafts.  I would love to open my pantry and find cute canned cards instead of beans and pickled pears, wouldn't you?


Tuesday, April 19, 2011

Springtime Pinwheels and Tutorial

This spring I am decorating with pinwheels.  They are so cute and fun - and easy to construct and display.  I've seen them as garlands, standing in buckets or vases like flowers, as well as on cards and scrapbook pages.  For these seen here, I used some gorgeous papers by American Crafts.  It's best to use a 2 sided paper, and these yummy spring colors are a perfect choice!  You will also need: ruler, pencil, hole punch, brads, glue dots, buttons, and a ribbon (if you want to string them into a garland) or lollipop or popsicle sticks (if you want them to stand up).

Step 1: cut your papers into square pieces.  I used a 6 inch square for the large pinwheels and a 3 inch square for the smaller pinwheels. 

Step 2: mark the center by using your ruler and drawing a light pencil line from corner to corner.

Step 3: Cut on your marked lines almost, but not through, to the center.  Leave at least 1/2 inch.

Step 4: use your hole punch to punch one hole in each opposite corner (4 holes total).  If you can get to the center with your hole punch, make a hole there also.  I had to use an awl to make my center hole.

Step 5: use a brad to secure the opposite corners to the center.  This was a bit tricky on the small pinwheels, but it can be done.

Step 6: adhere a small button (mine are from Cosmo Cricket's "Salt Air" line) to the center of your pinwheel using a glue dot.

Step 7: essentially your pinwheel is done.  Now you just have to decide how to use them!  I used glue dots to adhere a lollipop stick to the backs of the small ones and stood them up in a small tin (that used to hold loose tea).  There is some foam inside the tin to keep the stick steady and I punched a hole through the cover with my awl.  I decorated the tin with matching papers from American Crafts and glued a mound of green moss to cover the tops.  For the garland, I threaded my ribbon through a large (yarn) needle and simple wove it through the backs of the pinwheels to join them.  Because the holes are small, they stay put and don't slide up and down the ribbon.  I think it looks cute on my kitchen door.  It makes me happy to look at.