Showing posts with label Cricut. Show all posts

Thursday, December 22, 2016

Bible Journaling Tags

Tags are a great addition to your Bible Journaling and one more way to incorporate your creative side into your devotion and prayer time. You can use tags as "tip-ins" directly in your Bible, add them to your Faith Planner, use them as a card base, or as a bookmark, and so much more. Today I'm sharing a layered and stamped tag design in 3 color versions.
Each tag is made with the same base and stamped sentiment. I cut the 2-layered tag using my die cut machine. The star cut-out on the top layer really said "Christmas Star" to me. Each top layer was cut in white cardstock. I used waterproof ink (I used StazOn) to stamp the sentiment. To make stamping easy, I arrange the individual words directly on my large acrylic block so I can stamp it all at once. Each of these individually cut clear stamps is found on the "God is Love" faith stamp set. 
After stamping, I used multiple ColorIn watercolor pencils to get the two blended color backgrounds (yellow-orange-red and lt blue-dk blue-purple). I cut the back layer in a coordinating cardstock. For the white tag, I only added a bit of inking around the edge of the tag and then glitter around the star. As a finishing touch on each I used a coordinating LePen marker in fine tip and added a dotted line to follow the flourished top and bottom edges.

For my Bible Journaling Tags project I used:


Wednesday, August 24, 2016

Back to School


It's back to school around here. I love the yearly supply shopping and getting back to a routine. I'm glad my daughter loves school and shares some of my enthusiasm for this time of year.


It's also a great time for crafting up some back to school goodies. This year I created an adorable banner that I used for our annual back to school photo shoot and now have it hanging in our dining room. Most of the die cuts are Cricut cuts that I just selected randomly from various cartridges. I used school themed paper to coordinate the different elements. To add a little interest at the top of each pennant I added a small doilie (from SRM).  I also grabbed a few clear sentiment stickers from my SRM stash to add to some of the banners.


Of course we needed a sign for my 2nd grader to hold during the photo shoot and on the first day of school. I used an piece of wood (found a great size in my garage) and added some SRM stickers and a die cut title. Simple and much faster than the banner! 2nd Grade here she comes!!!

I also like to give a small gift to our new teacher. This small red wire basket was in the dollar bin at Target as were some of the included goodies. I used some more SRM stickers and put them on cardstock and attached a magnet to the back so they would stick to the basket. A little twine wrapped around it and the gift was done. Teaching is a hard job (I taught middle schoolers for 13 years). We like to look for anything we can do to make their day a little more fun and a little easier.

You can find the SRM sticker products I used HERE:

Friday, April 24, 2015

Canvas Night Light

Canvas lit up.
Our daughter rushed into our bedroom at 2am a few nights ago - "It's all dark! I can't see! The power is out! My night light is out!"  The power wasn't out, but her night light stopped working.  We found a spare and she went back to sleep.  But I couldn't sleep, so I began to dream up a new night light for her.
I sing "You are my Sunshine" to her every night, so I wanted to incoporate that into the design. This is what I came up with.  The image is from Cricut's "Home Decor Vinyl Wall Art" cartridge and I removed the sun and clouds in Design Space so that just the words remained.  I cut it from a large sheet of washi, weeded it out and used transfer tape to position it onto the canvas.  Then, I simply took it outside and sprayed it with some wildflower blue spray paint that I had on hand, removing the washi words shortly after to reveal the white underneath.  I probably could have done with a shorter string of LED lights, but did I mention this was a last-minute, use-whatever-I-have-on-hand, kind of project?
Canvas with no light.
I stapled the light string into place so that the lights would wrap along the outside of the canvas and fill the inside.  This was a quick and easy project and I'm sure I could have been neater about the whole plan and execution. It may not look super pretty with those green wires hanging out, but my daughter loves this thing!  She smiled sweetly when she read the words and said, "Oh, thank you, mama!"  Done deal and I hung it up :)  Sweet dreams, Sunshine!


Thursday, September 11, 2014

Sunshine and Chevrons Painted Sign

Just had to share my new painted sign.  I sing this song to my daughter every night and so it was the perfect sentiment to paint on a sign for her bathroom.  The chevrons were a bit tedious (I used painter's tape to mark them), but I really love the bright yellow background.  I created the word art in Cricut Design Space and cut it out onto tag board to use as a stencil.  I just used acrylic paints, so I'll seal everything with a clear coat of Krylon Acrylic Sealer.  I can't wait to hang it up!

I hope you had a chance to be creative today!

Wednesday, September 10, 2014

Two Page Sketch Challenge


September's Sketch Challenge from DCWV is a two-pager.  Yay!  I love two page spreads and including lots of photos.  Lots of photos on a layout means more story told.  There's still time to play along if you like 2-pagers and are inspired by this fun sketch. Just grab your photos and a stack :) - any stack!

The sketch:

My layout:

For my layout I grabbed The Snapshot Stack.  I snagged this stack on clearance for just $6 a few months ago and hadn't really broke into it, so I decided it was time.  This stack includes lots of little pieces and icons that you can fussy cut and add to your page, like I did.  Our daughter was 4 years old when these photos of her riding her bike were taken, so I was delighted to find a 4 of diamonds card in the stack to incorporate into my page.  For the title, I used a die cut from the Cricut cartridge When I Was a Kid.  I didn't have a 5x7 photo printed, but double matted the focus photo to more closely follow the sketch.  I added a bit of washi tape and used a pen for the border dots.
After taking the photos, I realized I had not yet journaled (gasp)!  Rest assured, I grabbed my black pen and wrote a few lines to tell the story of Hannah's first real bicycle.  I promise ;)


Thanks for checking in - happy scrappin'!

Tuesday, July 29, 2014

Monogram on Canvas

I just finished this large canvas monogram for our family room.  The canvas is a 12x16.  The striped background is from a Teresa Collins collection and I added the monogram cut from my Cricut Explore (Gypsy Font).  Everything is simply mod-podged on.  I love how it turned out.  We just finished painting our family room walls this rich green color (after gutting the entire room and re-hanging drywall where painted paneling had been).  It's going to look great in our completed room and I can hardly wait!


I linked up with other amazing creative inspiration here: 
Today's Creative Blog

Thursday, June 5, 2014

"Manly-Man" Masculine Cards

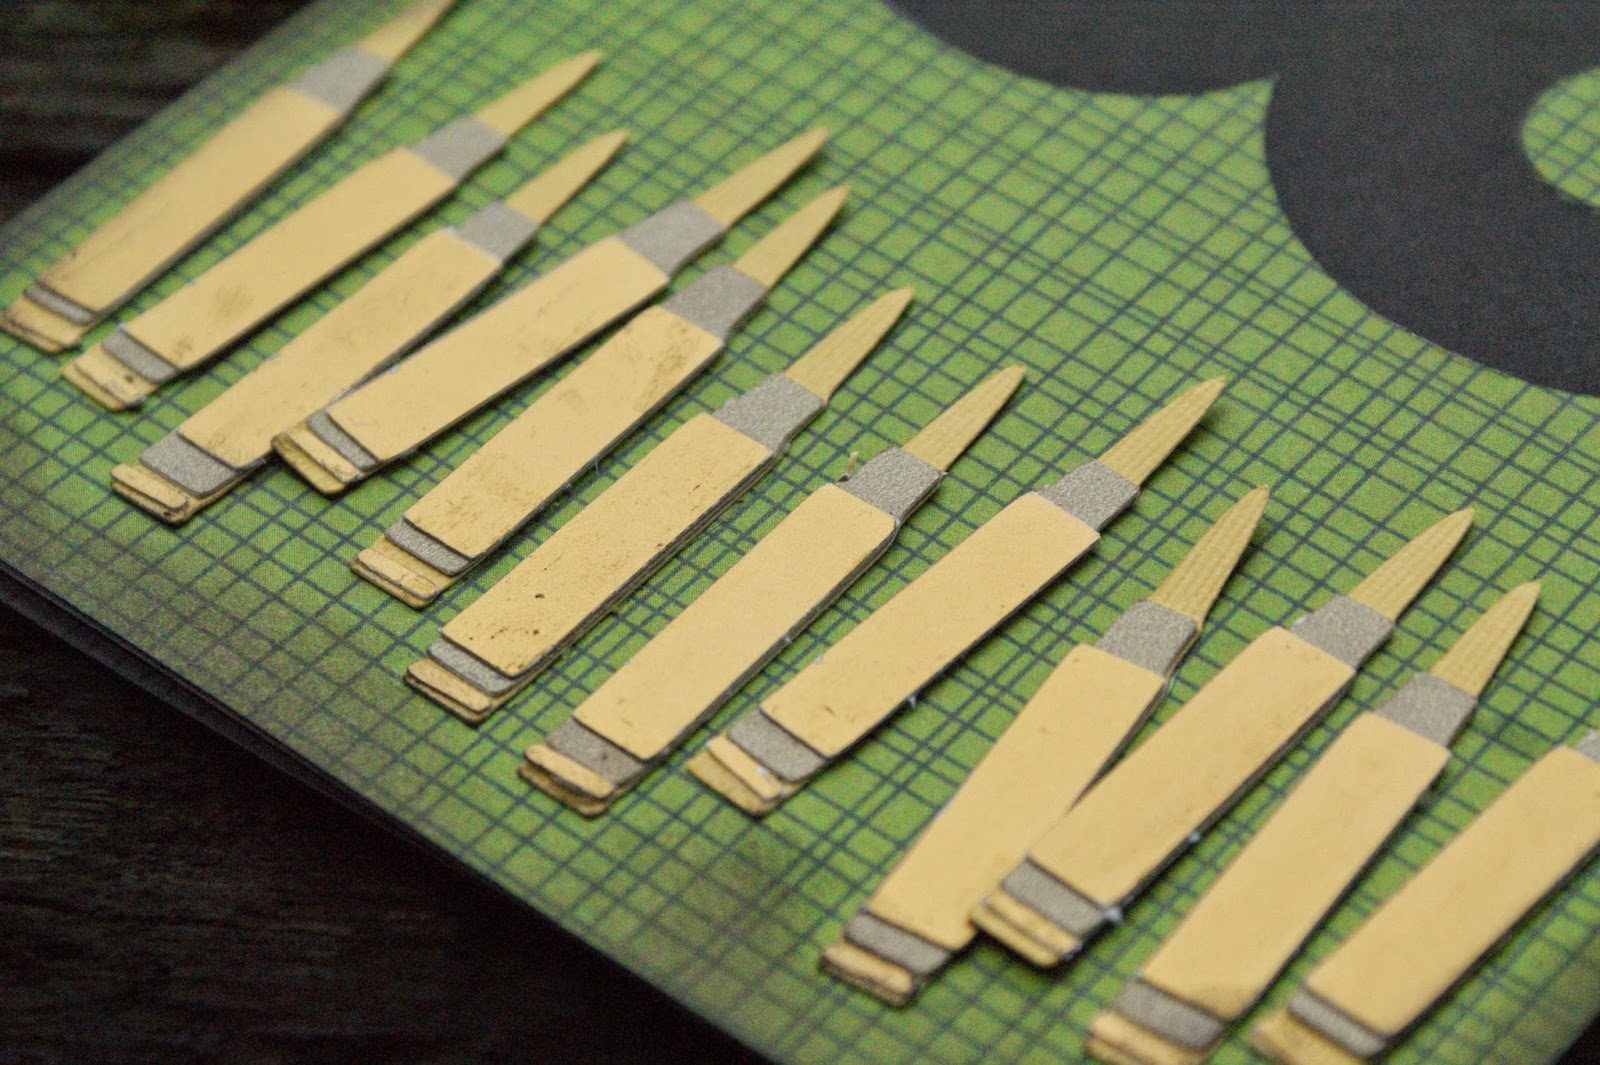
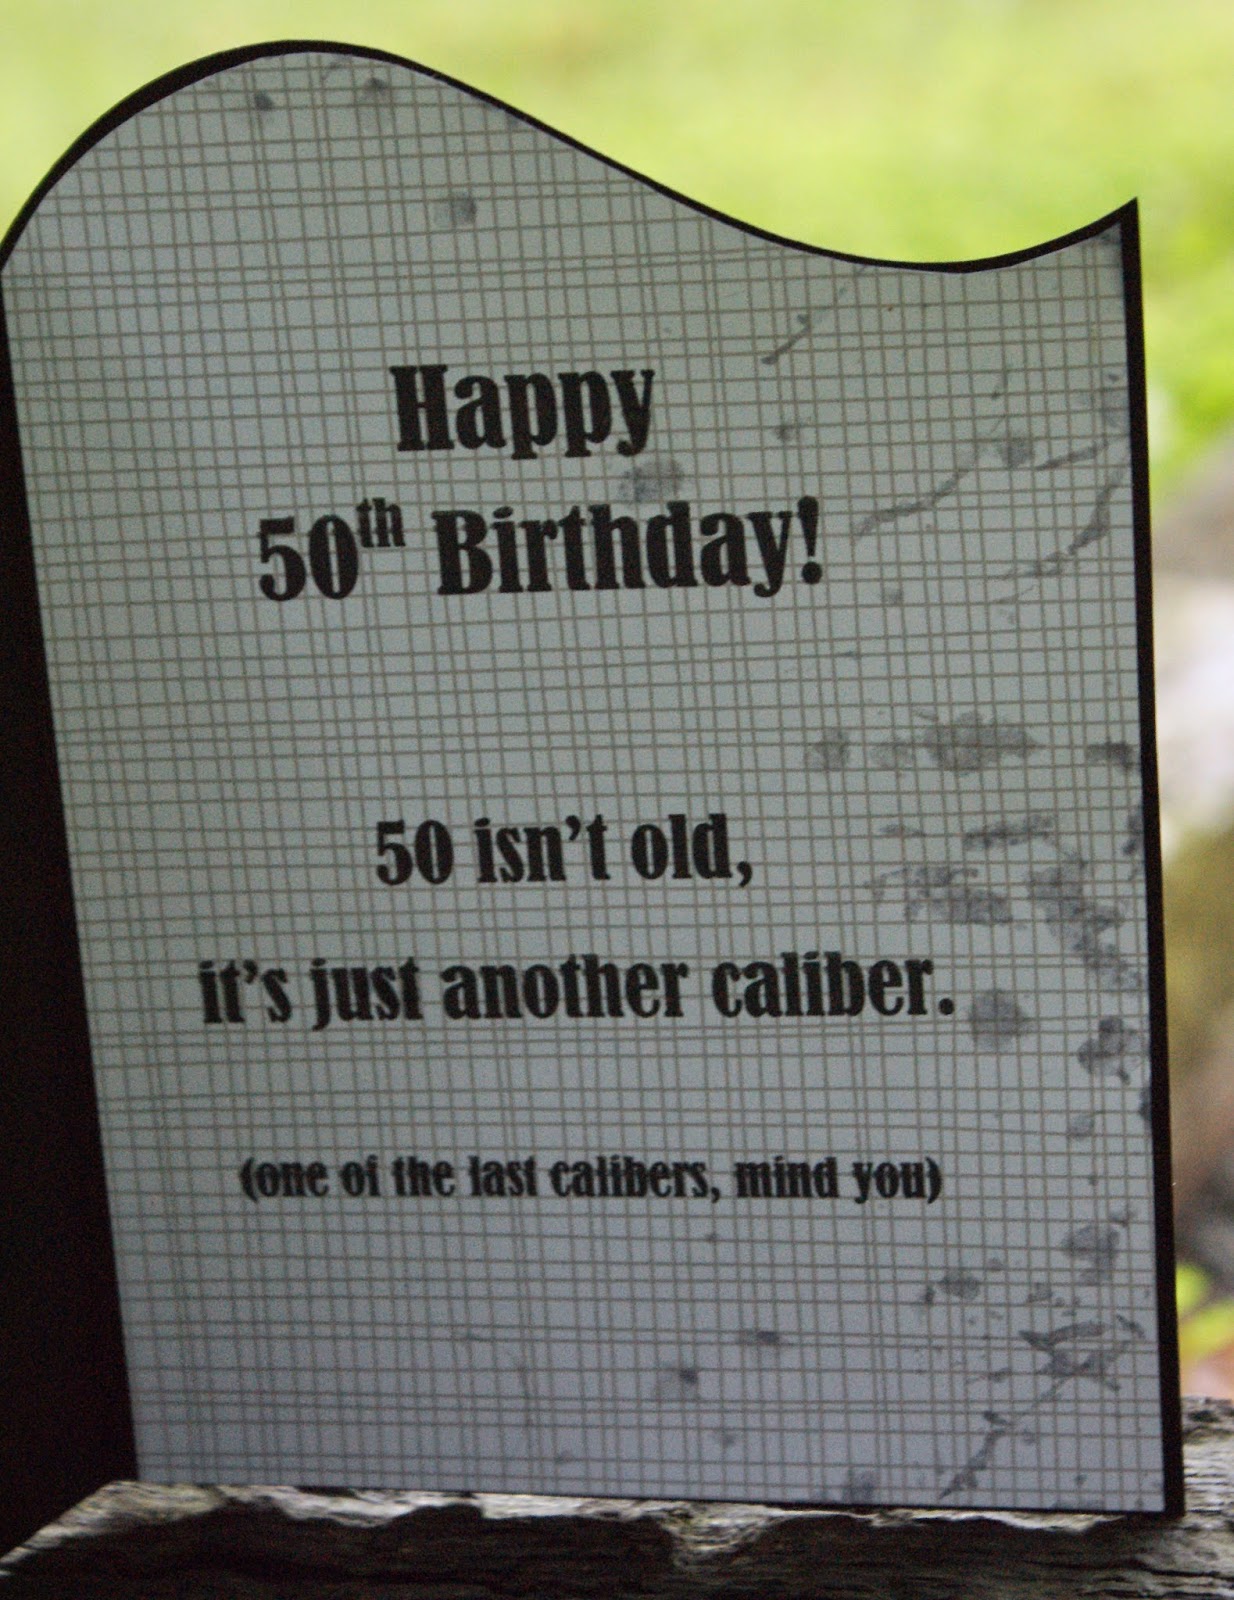
Tis the season for "manly" cards.  Mine usually seem to focus on a hunting or outdoorsy theme because, well, that's who we are around here.  My husband will be attending an old USMC buddy's 50th birthday party and he said he needed a card with bullets.  Okay.  He also was specific on the sentiment he wanted in the card.   Here you go, honey - a 50th birthday bullet card!
The "50" card base was cut with my Cricut - it's from the Life's a Party cartridge.  I removed the original candles from the cut (use your hide contour to do this) and used these bullets from Outdoor Man instead.  Tada - "bullet candles."

 Snicker, snicker.  He's a clever one with bullet humor, this husband of mine.
Need some more ideas?  Here's a few cards that I have made for my hubby...
We have the gun theme collection...
Check out Cricut's Outdoor Man and Stand and Salute cartridges for great masculine images.

And some general masculine cards...
The top left card is a "pre-finished" project that I found in Cricut Design Space
and cut with my new Cricut Explore.
 
Father's Day 2012

Monday, May 5, 2014

Teacher Appreciation Week

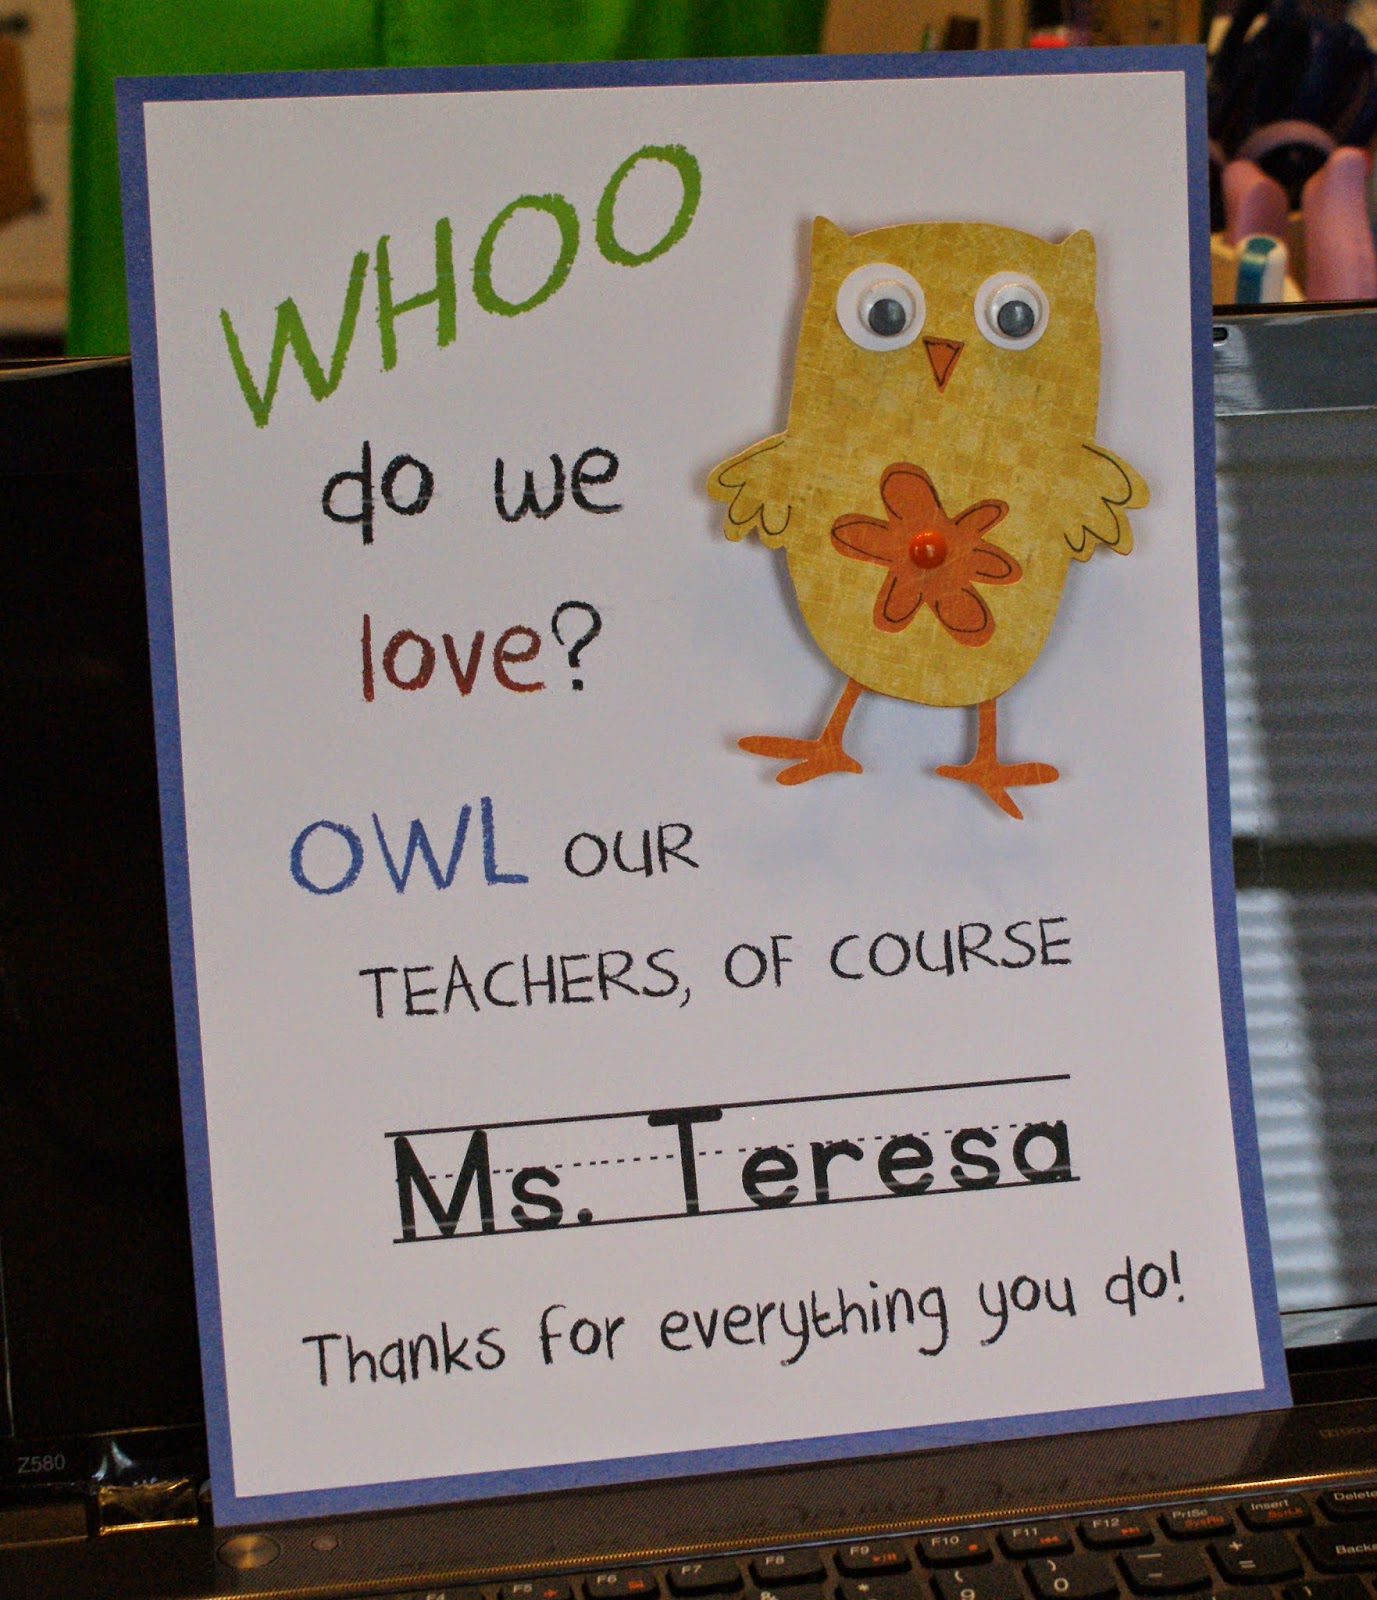
Having been a classroom teacher myself, I know how much teachers appreciate Teacher Appreciation Week.  It's just nice to be noticed for the hard work you've put in all year long.  Whether the recognition is from the administrative staff, the parents, or the kids you teach, any little something - even just a simple card - brings a smile to a teacher's face and warms the heart enough to get through the last long stretch of the school year.  I helped make these cute signs for my daughter's preschool teachers' doors.  What can I say?  I love owls!  I designed and printed off the background from my computer and added a cute and colorful owl cut with my Cricut (Hoot n' Holler cartridge) on an Action Wobble, so it moves.  It made me smile just to make them wiggle with their cute googly eyes - I hope the teachers get a warm-fuzzy, too!

I had picked up a few of these mini owl notebooks quite a while ago in a clearance bin and thought I'd just put a little tag on them for a quick gift and thank-you.  The stamps are from Technique Tuesday and Lillian Vance.  I cut the circle and scallop with my Cricut and tied it up with some twine.  Every teacher needs a notebook, right? A quick and inexpensive gift.  Hannah wrote a thank you on the first page.
I might get a few other things together this week.  What are you doing this week to thank a teacher?

Tuesday, March 25, 2014

Silhouette Cards

I made a quick set of note cards today using a few different silhouette images featuring dogs from A Child's Year.  I love that cartridge!  For paper, I grabbed one of my DCWV stacks.  I recently found "The Snapshot Stack" on clearance, so I grabbed it, some washi tape, clear sentiment and stitching stickers from SRM, and a few other odds and ends (enamel dots, twine, paper clip) to create these cards.


Tuesday, February 11, 2014

Cute Critter Valentines

Hannah and I finished her class Valentines over the weekend.  I asked her to choose 1 or 2 images for her Valentines from the Create a Critter cartridges.  I really hoped she was going to choose an owl (because I love owls), but despite my attempts at persuasion, she didn't (sniff).  She chose a kitty and a birdie for the girls.  The bird with the heart wing didn't have a hat, but H. insisted that it needed one, so we cut the hats from another page.  I love that she has her own artistic/creative eye.  Her choice for the boys was the cute fire dog.  One of her classmates really loves all things fireman and fire engine related, so all the boys are getting this puppy.  She helped me choose the paper colors and then we cut all the pieces out with the Cricut.  She and I glued all the layers together.  She did much better placing and fitting things together than I anticipated, so my OCD didn't kick in too much.  :)  Then we put together a few items in baggies (pencil, erasers, notebook, stickers) and taped the finished critters to the baggies with a cute sentiment on the back.  She can't wait to take them to school for her friends!

Birdies and Kitties for the girls.
Fire house Puppies for the boys.

Saturday, February 8, 2014

Love These Layouts!

It's February and love is in the air...and on my craft table! Today I want to share two recent layouts that I really love.
First up: "Me & You."  Even thought this photo of my husband and me is out of focus, I love the candid nature of it and that we are both smiling and looking happy.  Sometimes those imperfect photos make great layouts! This one uses some of the new Fancy Pants "Be Loved" collection.  I really was drawn to the water color feel and soft palette.  So many little elements are available with this collection, too.  I altered my background sheet by drawing a large heart, sewing the outline with pink American Crafts twine, and then adding some paint and pink chalk to the inside.  I also added twine in other places - the tags and several cross stitches on the left side.  The "me & you" sentiment was cut with my Cricut - Graphically Speaking is an old cartridge, but still one of my faves.  The pink glitter border strip is from Teresa Collins.

I picked up some new My Minds Eye yesterday at Scrapdoodles and had a little fun.  I also recently added a couple of new cartridges to my collection, so wanted to use them right away, too.  The beautiful background sheet is from MME's Now & Then, "Dorothy" collection.  The heart doily (LOVE) was cut with my new Edge to Edge Cricut cartridge.  The title is also from a new cart - Small Talk Frames and Tags.  The rest of the elements are MME.  I'm really loving the phrases and mini letters available with this collection.


Thanks for visiting! I hope you have a LOVE-ly day!


Monday, October 21, 2013

Cricut: Christmas Village Online Class now Open!

http://www.mycreativeclassroom.com/course/info.php?id=709
Course Description: In this course, we’ll take an in depth look at Cricut’s Christmas Village Seasonal Cartridge and create a variety of projects for all crafting levels. This cartridge contains 50 silhouette-style images with simple and old-fashioned appeal. Many of the images are intended to create 3-D projects, but a lack of included instructions has stumped many Cricut crafters. Has this cartridge been sitting in your stash for awhile because you just don’t know what to do with it? If you’ve been feeling the same way, go get that cartridge out of the cupboard, and come on into this classroom, because we are about to create some awesome projects! Join me for this 4-week class and we’ll clear up any confusion about this cartridge and create several unique projects including a Christmas countdown village display with treat boxes (yes, this cart can do that!), a framed nativity project, cards, a layout, and more seasonal and alternative project ideas.I’ll offer assembly, longevity, and storage tips so that your creations last more than one season. *NOTE: This course has an advanced skill level. Students should come to class already familiar with their Cricut machine. Specific images and cut sizing will be shared. Knowledge of how to use a Gypsy and/or Cricut Craft Room is beneficial, but not a prerequisite for this course. If you do not already own this cartridge, it is available for purchase at local and online retailers and is also available for digital download into your Cricut Craft Room. 

Class Outline 
Week 1: We’ll begin with a cartridge overview and get right into one of the more time-consuming projects: the 3-D village with treat boxes. 
Week 2: We’ll continue with our village display and accessorize it with people figures and a stand-alone ice skating rink display. 
Week 3: An appealing feature in this cartridge is the nativity display.This week we’ll create two projects using nativity cuts – a framed piece (a great gift or home décor item) and a small-scale shadow box project. 
Week 4: In our last week, we’ll see what else this cartridge has to offer. Projects will include cards, a layout, and one more silhouette project – this time with vinyl.

Monday, August 26, 2013

Altered Notebook with Cricut Artbooking Cartridge

I caved and bought the new Cricut Artbooking Cartridge.  And I'm so glad I did.  I haven't had a chance to play with it as much as I'd like, but I love all the overlays and extras on this cartridge.  I also have the coordinating stamps from Close To My Heart and can't wait to add them to my layouts and projects.  Here's a quick notebook re-do that I recently completed with this cartridge.  All the cuts are from Artbooking.  I added number stickers from a leftover Teresa Collins sheet that I had, and then tied some ribbons around the spirals.  I can't wait to do more!

Saturday, August 17, 2013

Wedding Album Layouts

I recently completed a wedding album for my oldest sister and her new husband.  I was able to bring it and give it to them in person when I returned to Wisconsin for a visit.  I love watching people look through their new albums - it totally gives me the warm fuzzies!  It's really something special to be able to use your gifts and bring happiness to others.

Here are a few of my favorite pages from the album.  I just love this first page - such a cute photo of the couple and the gold Teresa Collins paper is magical!  Throughout the album I used primarily Teresa Collins, Authentique, and DCWV papers and of course my Cricut.  Enjoy!


Friday, June 21, 2013

Wedding and Shower Cards

Ah...love is in the air.  I wanted to share a couple of wedding/shower themed cards I made recently.  This first is a military-wedding inspired card.  The large cut was made with my Cricut.  I embellished it with stickle dots and added a ribbon and a couple of lines from SRM clear sticker borders.


My second card was made for a bridal shower (which I sadly had to miss), but it was a fun card to make.  Again, the main image was cut with my Cricut and I used pop dots to give it depth and stickles to give it some shine and elegance.


Happy wedding season!  I hope you're able to share in making someone's day lovely with your gift of crafting.