Showing posts with label banner. Show all posts

Monday, October 17, 2016

Kid Project - Boo Banner


Do you like to craft with your kids? I love to craft with my daughter, but I have to admit - sometimes it's really hard to let her do her own thing without me "directing" her. This month SRM asked me to create a project with kids and let them have fun! And guess what? We both did!
 For this "Boo Banner" project I used 5 embossed glassine bags as the banner bases. I added some acrylic paints in yellow and orange for color and texture and let it dry. I let my daughter pick out a font for the letters and cut them out with my die cut machine. Then I gathered all my Halloween themed stickers from my SRM stash. 
I told my daughter to use the borders to decorate the bags and then we would add the letters on top. My idea was to keep everything in nice straight lines, but she had her own ideas. So, with a deep breath, I stepped back and let her create.
As you can see, she piled on stickers and borders in all directions and you know what? It's awesome! Each piece is fun, colorful and original - just like her. We attached the pieces to ribbon with mini clothespins. Each mini clothespin also has a spider sticker on a punched white circle attached.
Letting your kids into your crafting stash can be scary at times, but it's also a wonderful way to celebrate and teach confidence in their own style and creativity. Plus, you'll both cherish the time you get to spend together and have a great project to show off both of your talents!

For this project I used:


Friday, September 2, 2016

Happy Birthday Banner for a Birdhouse Birthday


We recently were able to celebrate the 70th Birthday of a wonderful and sweet woman - my husband's mom. To add to the day's celebration I created this fun birdhouse themed banner to hang at her party. I really like how the natural look and feel of the burlap ribbon and twine plays with the soft colors and elegant touches of lace ribbon and doilies.

I used my Cricut to cut the basic banner shapes (3 layers). I cut 4 inch doilies in half and adhered a half on the bottom portion of each base piece and added a row of black stitching sticker at the midpoint. Each two layered letter is adhered with pop dots for added dimension.


I love to add words and phrases to my projects and SRM clear stickers are perfect for doing just that. I used a variety of sticker sheets to find just the right words in just the right sizes to add fun details.

I wanted to add a little bit more to my banner and a strip of the new raw-edged burlap ribbon behind each banner shape added another great layer and natural element. I used mini clothespins to hang the pieces from the new jute twine.


To dress up my banner I also added several lengths of ribbon to each end, including the wired burlap (curled so cute!), white lace, and bit of the blue in a blue striped ribbon from my stash.


For this project I used:

Tuesday, May 22, 2012

DIY Baby Shower Ideas and Tutorials

I'm very excited to offer another class through My Creative Classroom this summer!  I've put together many of my favorite ideas and tutorials for the cutest diy baby shower ever.  This 4 week class is full of adorable ideas, whether you're planning a shower for a boy or girl.  We'll make invites, thank you note set, diaper cakes, banner, favors, decor, and more!  My theme for my sample projects is owls, but every project is easily adaptable to your shower colors and theme.  Join me for this fun and project-filled class and prepare a great shower for that next baby in your life!


The classroom is now open for registration (click on the photo above or Here).  Class start date is June 25th.  Remember this class is completely online and can be finished at your own pace.  During the class, help is available through interactive forums and project galleries.  I hope to see you in class this summer!

Saturday, May 12, 2012

Wedding Celebration

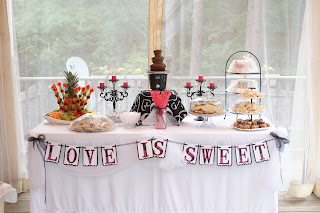
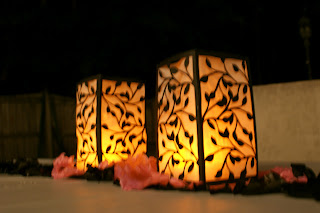
Hannah and I had a fun trip to visit my sister in SC and help her put on a very nice backyard party to celebrate my niece's wedding.  We made banners, luminaries, signs, a card box, set up a fun photo booth area, crafted two hula-hoop chandeliers to hang, and more.  Fun, fun, fun!  I especially loved how the dessert table turned out, but was pretty happy with everything.  It was wonderful to be able to give my niece Kayla and her husband Corey a beautiful evening to celebrate their beautiful love!


Wednesday, October 5, 2011

Little Yellow Bicycle's "Happy Fall" Projects

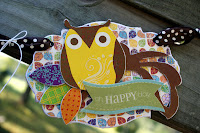
I was lucky enough to pick up some of the new Little Yellow Bicycle fall line, "Hello Fall!" at my LSS, Scrapdoodles, and I "fell" in love.  I love these papers - the colors are rich and vibrant and the details are so wonderful.  Then I looked at the embellishments all hanging happily together, and "Wow!"  I wanted everything!  The best part is that I could see using the embellishments beyond my scrapbook page and onto some fun accessories and home decor.  I first started with my scrapbook page, combining a few of the double sided papers and a strip from the border sheet.  I mimicked that "happy Fall" cluster again in the upper left for my title.  I added some punched circles and some of the fabric and chipboard embellishments.  It came together quickly (so nice when the paper itself inspires the layout design!) and is perfect for any type of fall photos, like these of Miss H. playing in the leaves last year.

 At left are the items I started with - 5 sheets of double sided papers and 3 embellishement packs - fabric, chipboard, and felt flowers.  I knew I wanted to use the felt flowers for hair barrettes and they worked out perfectly.  I also used the 2 fabric buttons on barrettes - too cute!  After I made the barrettes, I decided to make a little hanger for them out of ribbon and a chipboard tree.  I love it and haven't decided if I will keep it or give it as a gift to some sweet little girl :)

 Next on my list of projects with this cute stuff was a little banner for my door.  I dug out 4 pieces of Maya Road chipboard I had and covered them with paper and embellishments.  It was so easy and I love how it turned out!  I did sand the edges of most of the pieces to help them stand out against each other, but other than that, I didn't alter much of anything.  I punched holes using my Crop-a-dile and used medium width ribbon and then a piece of twine to string it together.

If you want to see these projects in person and add some of this line to your stash, I recommend you hurry out to Scrapdoodles (if you're local to Fredericksburg) and pick it up.  I think I may have to get some more, too, before it's gone.